
Who is “he”
It’s you! I don’t want to say your way is bad, it’s not efficient.
Eh i know, but i wanna take time to make my shows as Season 1 episodes 1 to 4 was finished in a week.
You missed the mark. To be lazy is to be efficient. The more efficient you are, the more lazy you can get! That’s how many of the inventions came to be: The typewriter made by someone lazy of writing by hand, and the keyboard by someone lazy of buying soo much INK!!!
If you want to get to this level, you’ll need to first start with a storyboard for your animation.
A storyboard technically is where you plan how the animation will go, from what angles, in order of how you might want things to transition. Here’s an example:
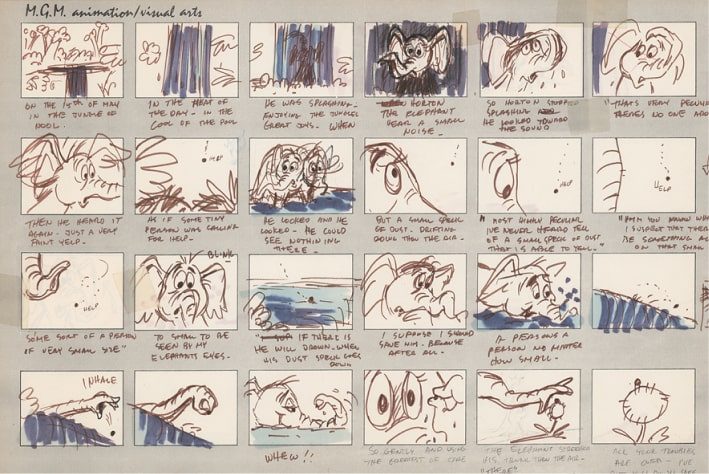
As you can see, storyboards are meant for planning and need to be simple. If you see something you can improve or don’t like, it’s always easier to move the scenes around in the storyboard or make edits as needed rather than editing 200 frames of a completed animation to make something work.
Next step, animating the environment.
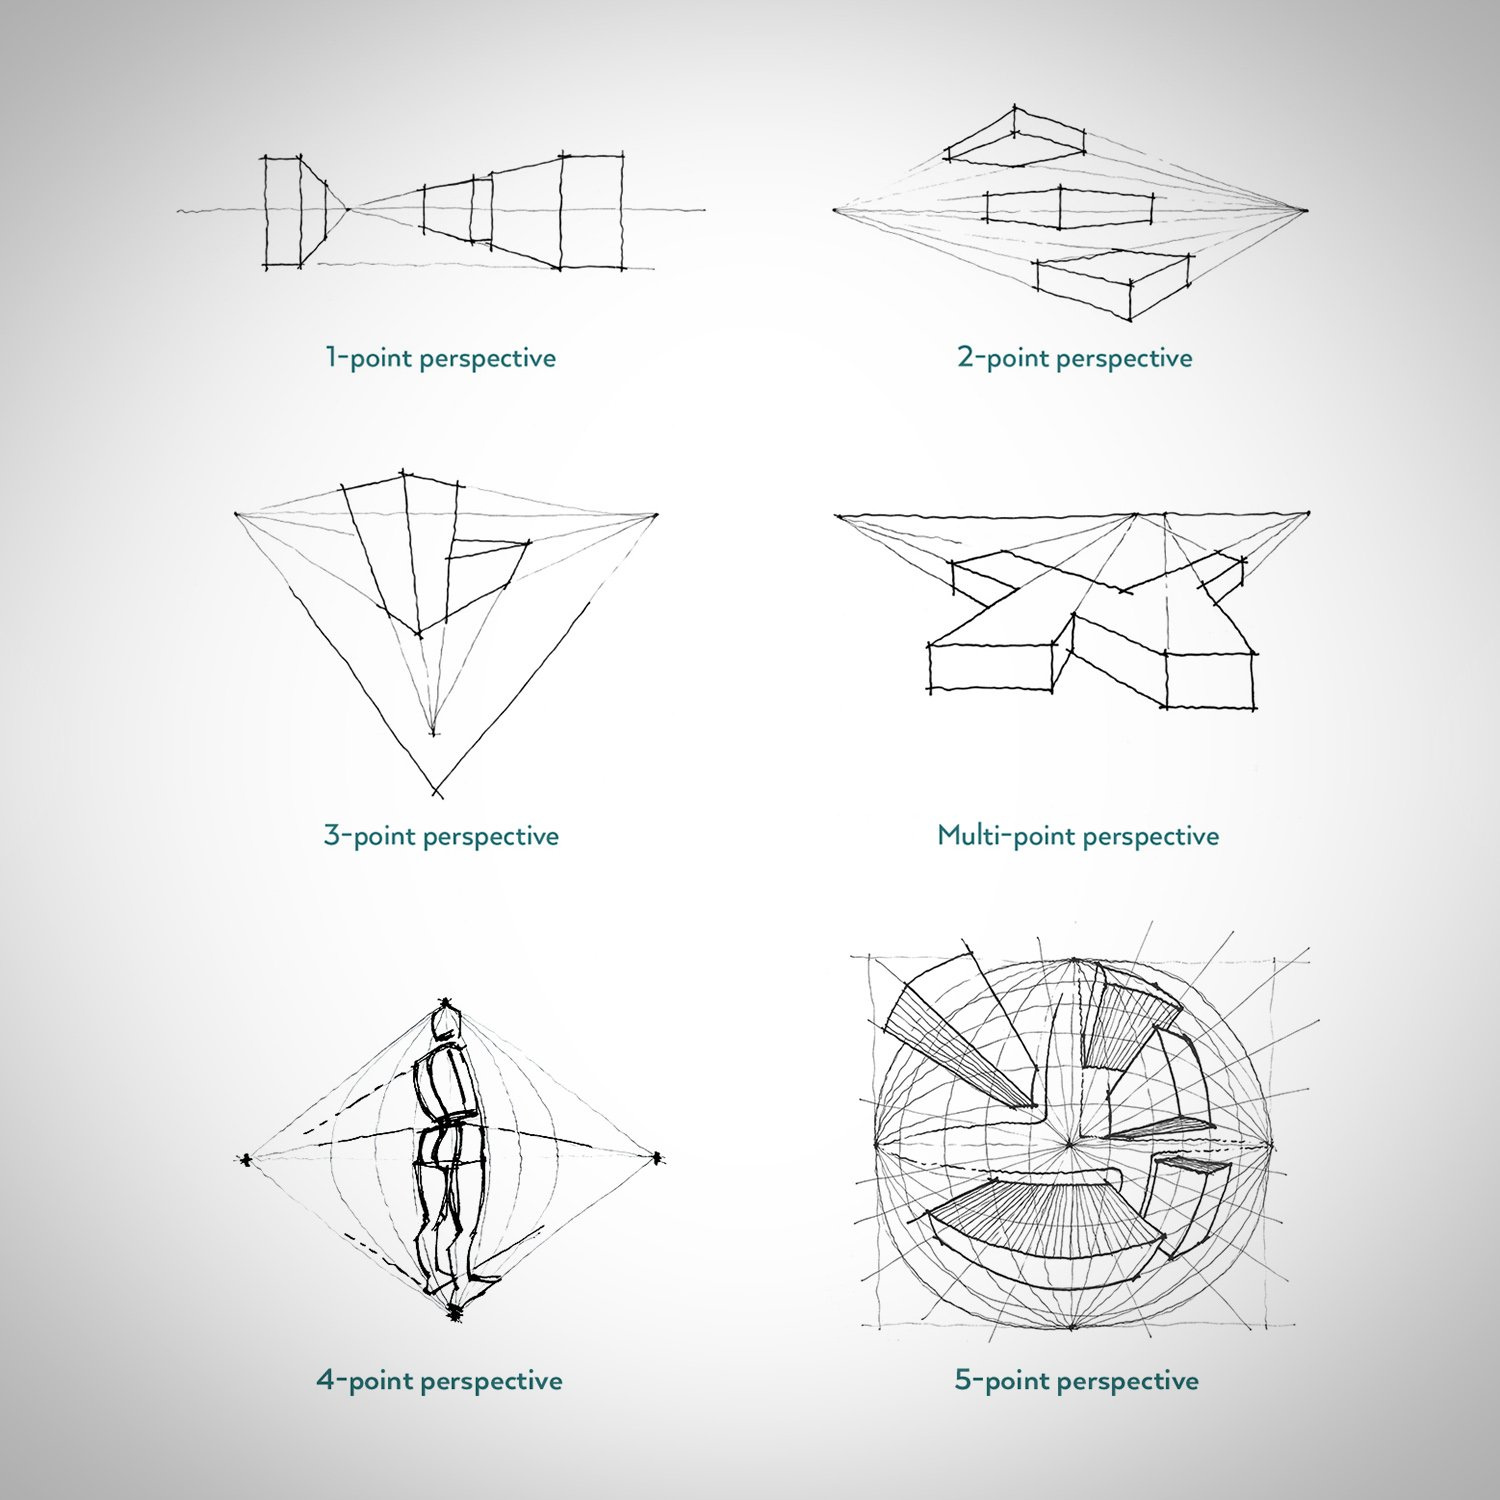
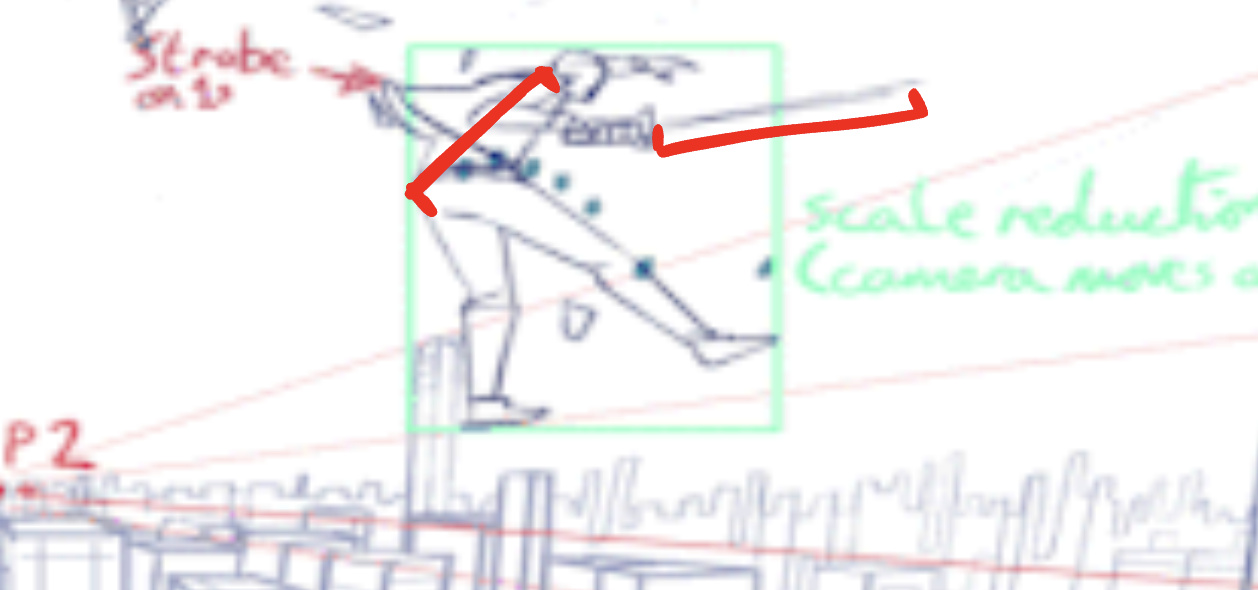
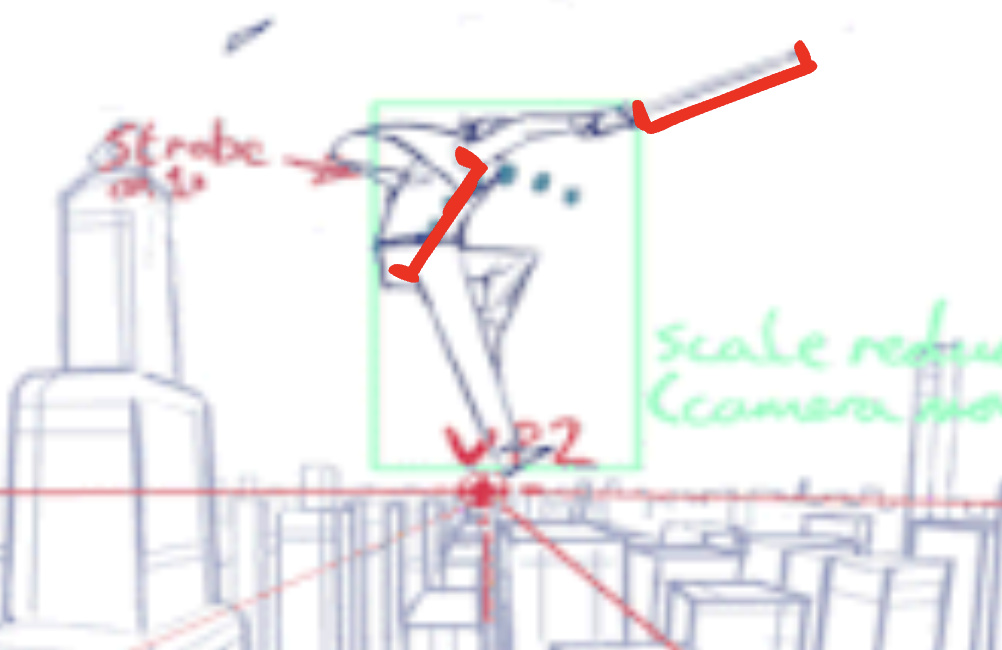
You need to learn how to control environment through perspective points, and apply this same logic to your characters.
Perspective points provide the “guide-lines” for 3D environments.
Not only can these points be used for the environment but even with the characters.
You can see in the GIF you send how the main character (MC) moves from right to left side, his back side also switches based on where he is in relation to the center of the frame, which is where the perspective point is.
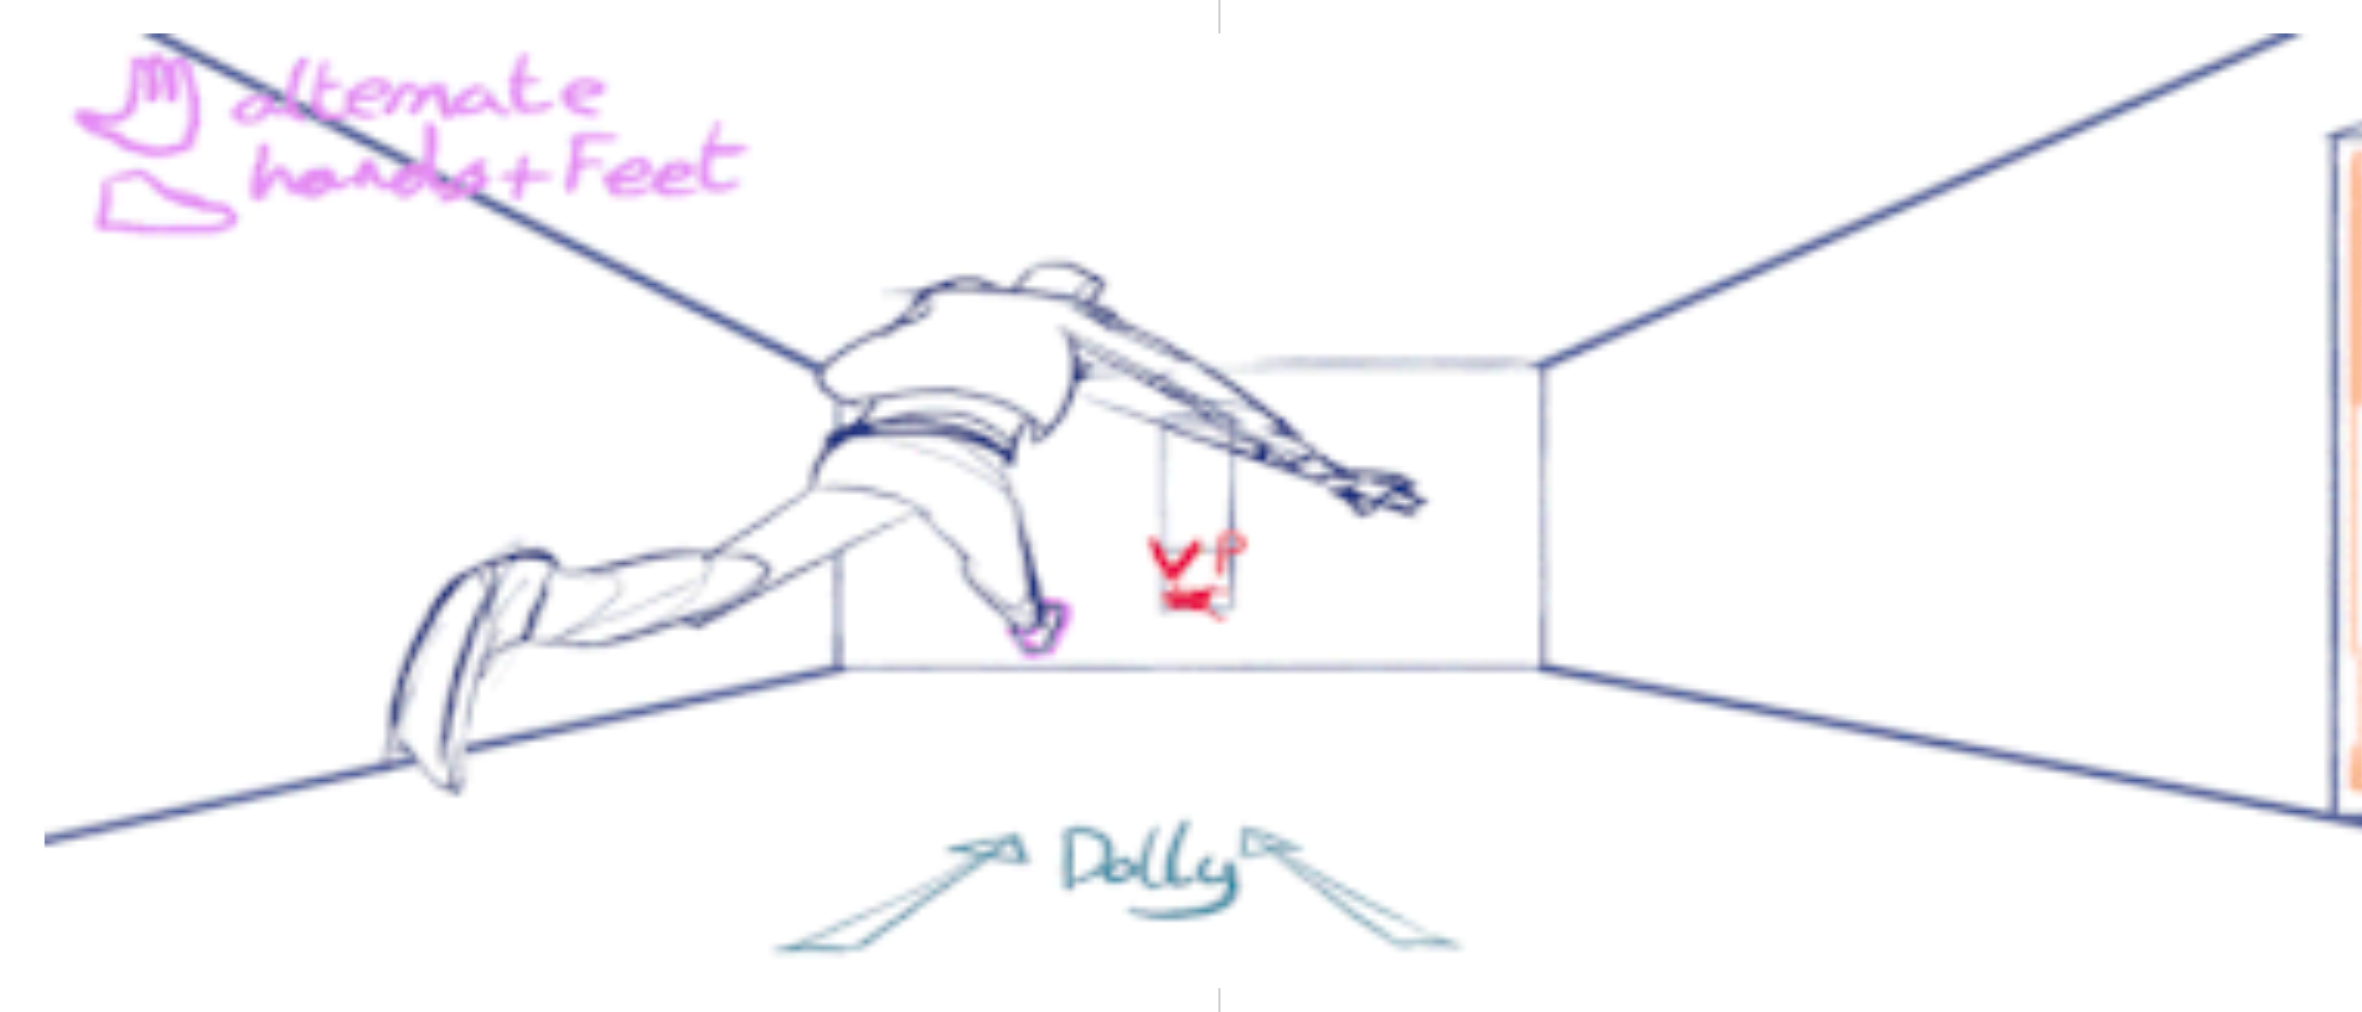
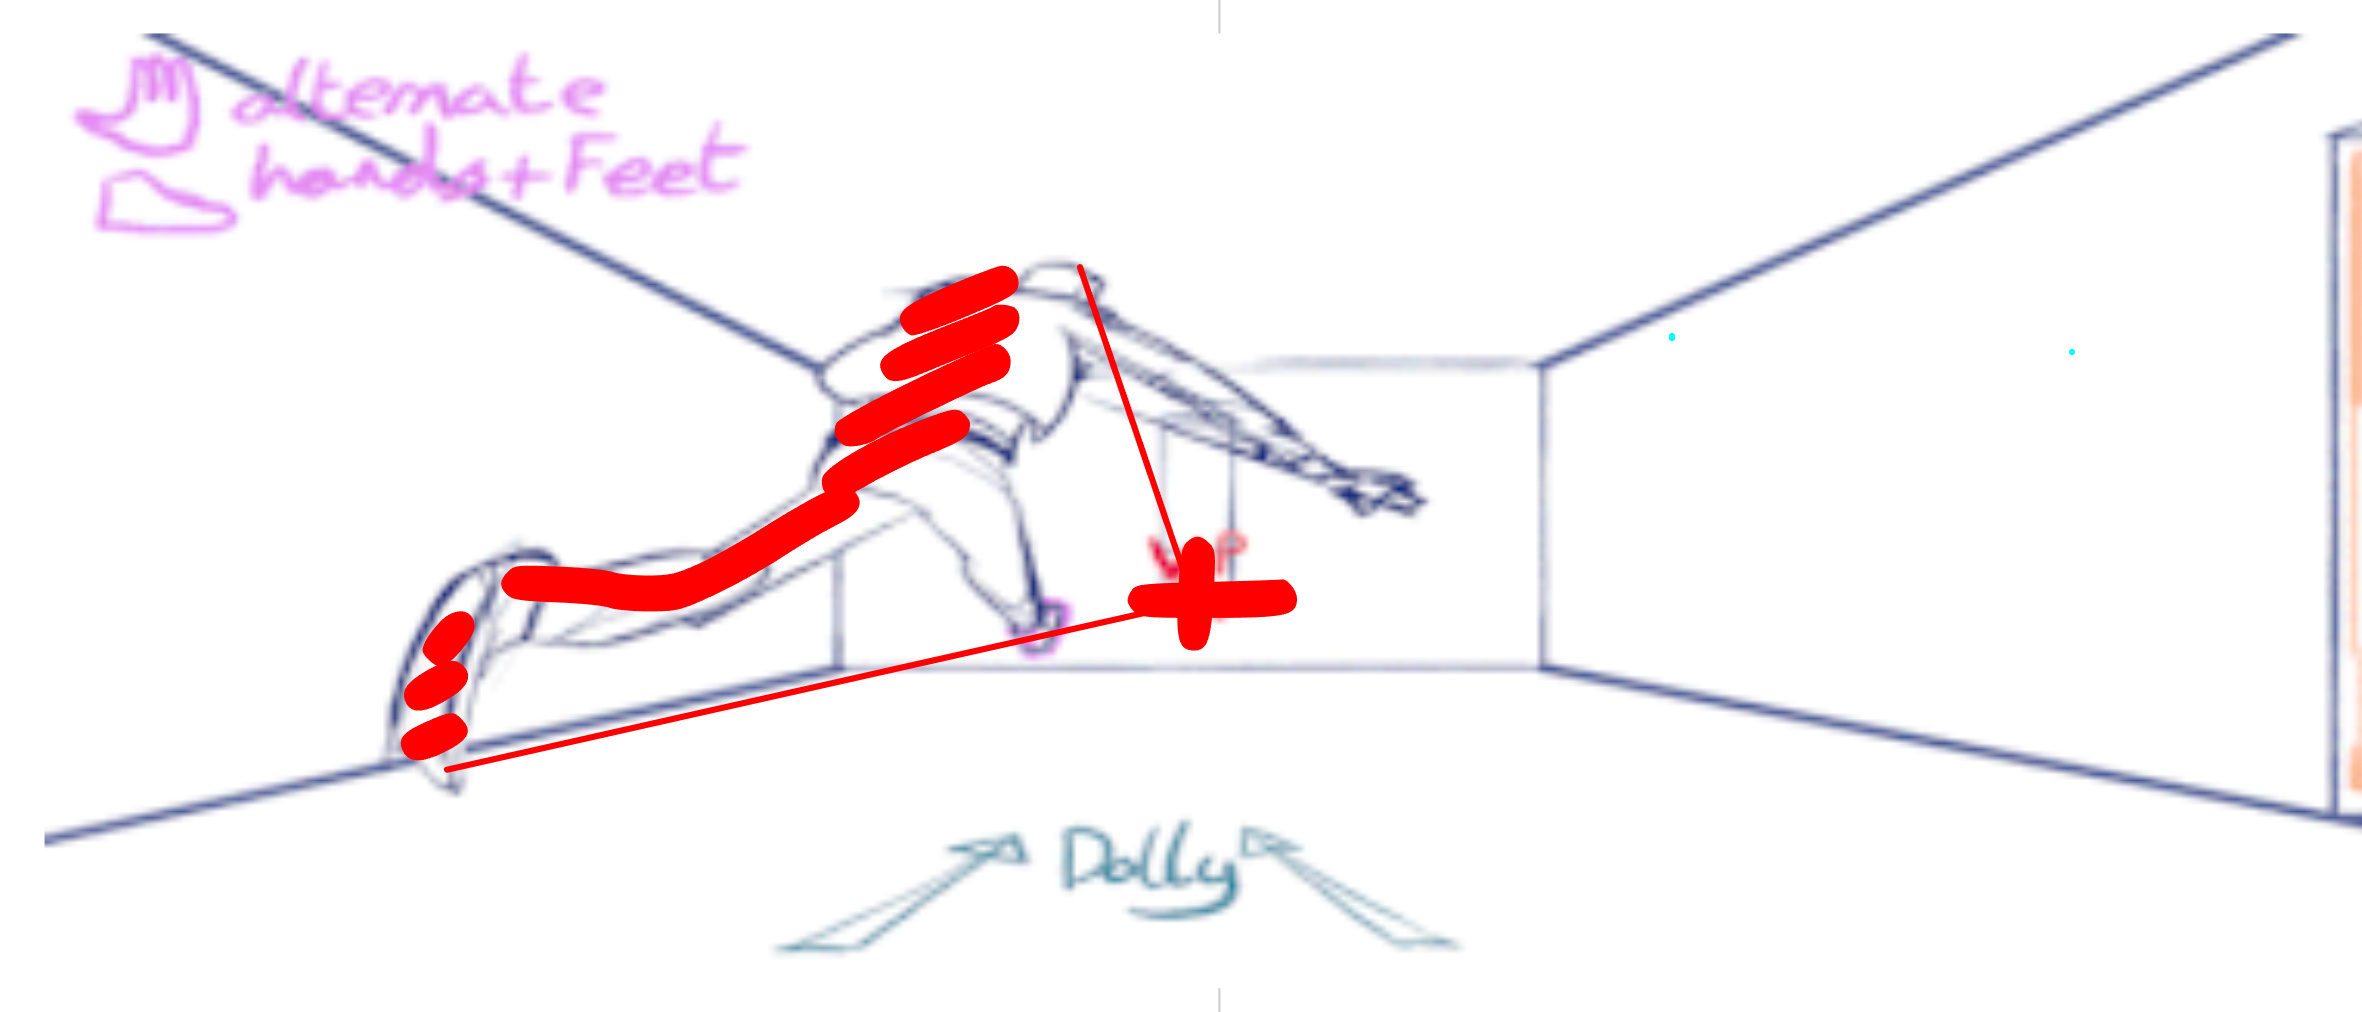
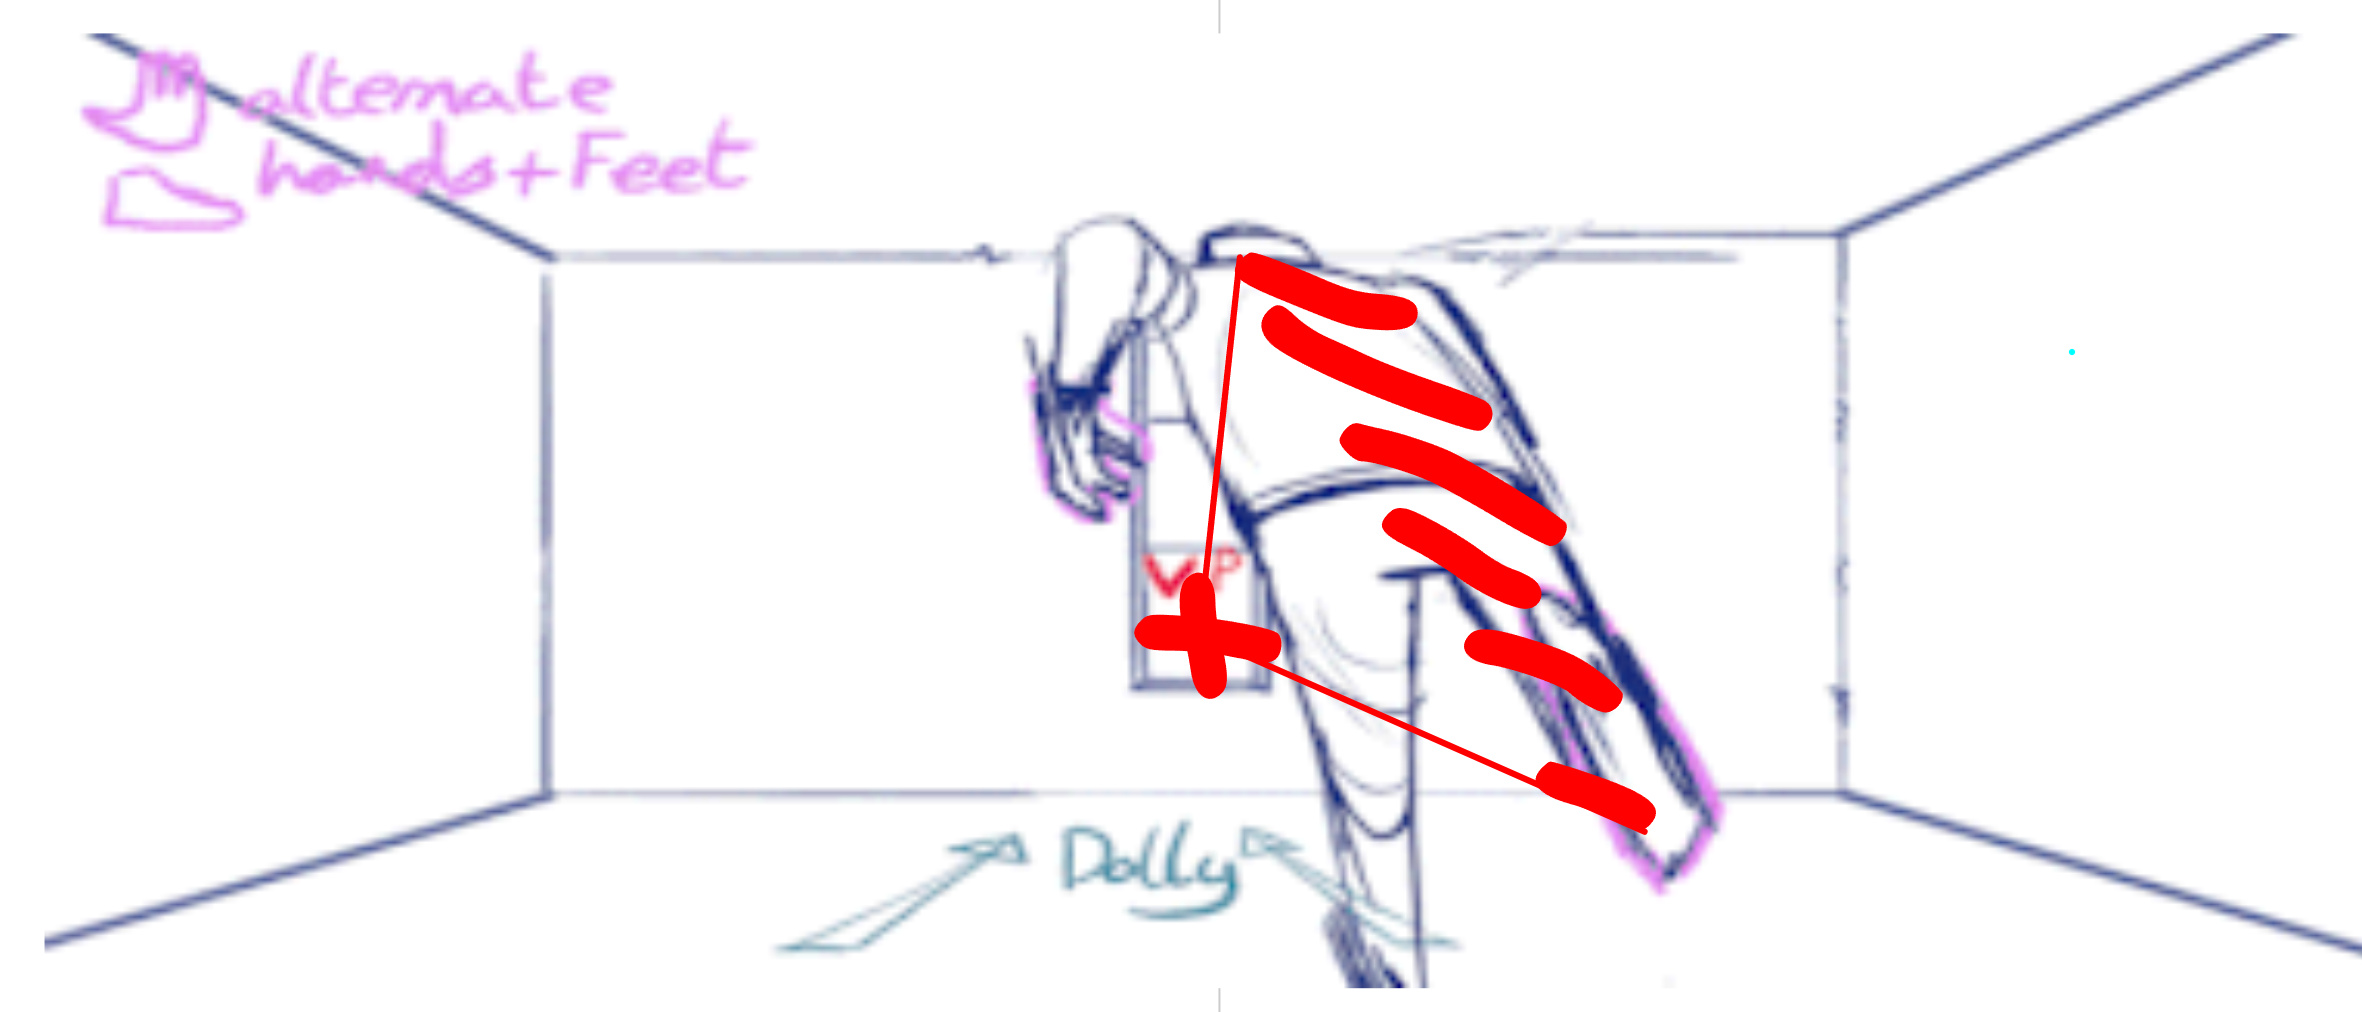
Also notice how lines in the room align with that same point.
Perspective points are very simple, but very very effective especially in 2D animation (where as in 3D that’s not something you’ll need to worry about).
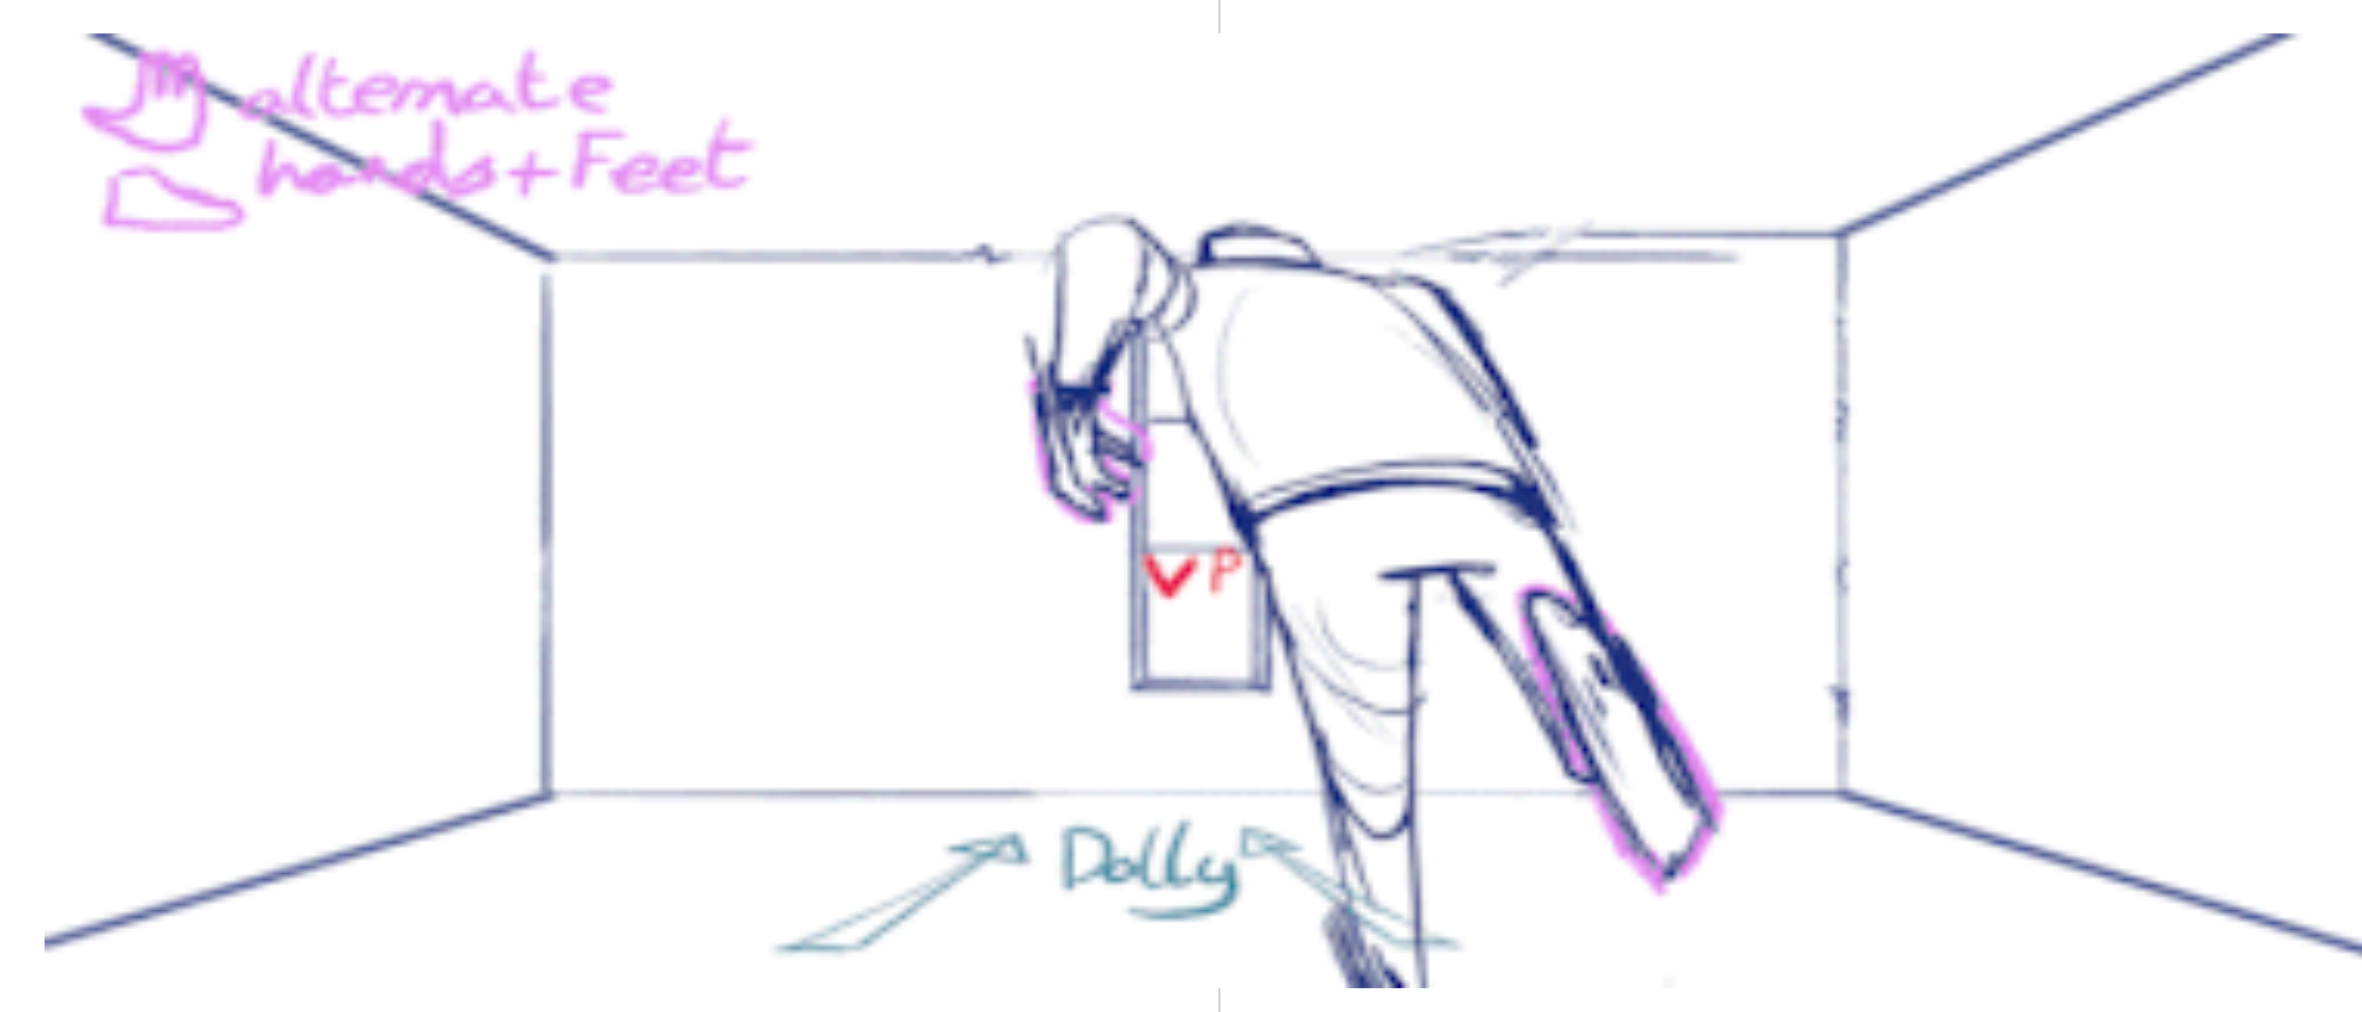
Also notice how the farther away something is, the smaller and closer it is to the perspective point.
This is especially important to remember when animating particles, like the glass shatters.

Think of the line from your camera to the perspective point as your z axis.
Personally I think this is one of those things that make 2D animations feel more “alive” than rushed 3D animations, just because you can easily stretch all your lines as needed. Even the MC can be stretched when running. Attempting something like this in 3D is possible… but it won’t be easy. This is one of the main features that split 2D and 3D and makes it easier to tell them apart.
You’ll also need to take other things into account with the environment such as wind (jumping with your hair blown in opposite direction), fire/ smoke (running through flames or fog, or breathing in winter), biome/ weather (running on sand, sliding ice, or over water puddles), material (metal bending slowly, wood breaks at a point, glass shatters instantly), etc.
I am no 2D animator.
I highly recommend watching someone that is and see how they do things.
Whenever you’re watching a movie or some cool animation on yt or what not always try to look for the perspective points and focus on how these animators work on particles and environmental elements.
You’ll be surprised how much you can learn by observing.
For practice, you can even try animating a scene without any characters, just moving a camera from room to room then add furniture in. If you don’t scale things properly that same furniture won’t fit inside the room on all frames, which makes it good practice.
Or animate a scene walking down a street and have “squares” as placeholders for people, then one by one replace these squares with people. Don’t overdue the details. In animation you might have to draw something a million times, so trying to make people look realistic will be a struggle. Keep it simple. And the farther away people are from the camera the less details you’ll need.
I’ve seen your animations before and I definitely see your potential, if you keep at it for a good while I’m sure you’ll get there
3 Likes
Thank you this was very helpful
1 Like
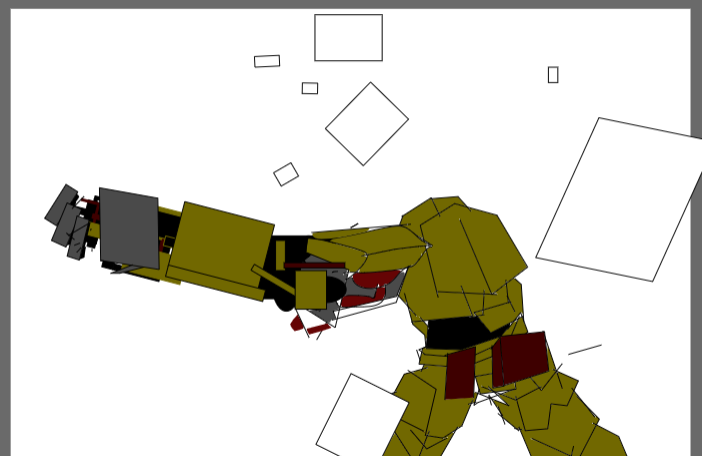
Ah I see, something with an arm that large is different than your typical human.
First thing I want you to do is take a look at your character’s size. Try to find things you can connect— for instance, in your drawing, the arm (without the “hand” part) is twice the height of your body. Knowing that, let’s say the height of the body is 1. Then the first part of the arm is 1 unit long and so is the second half.
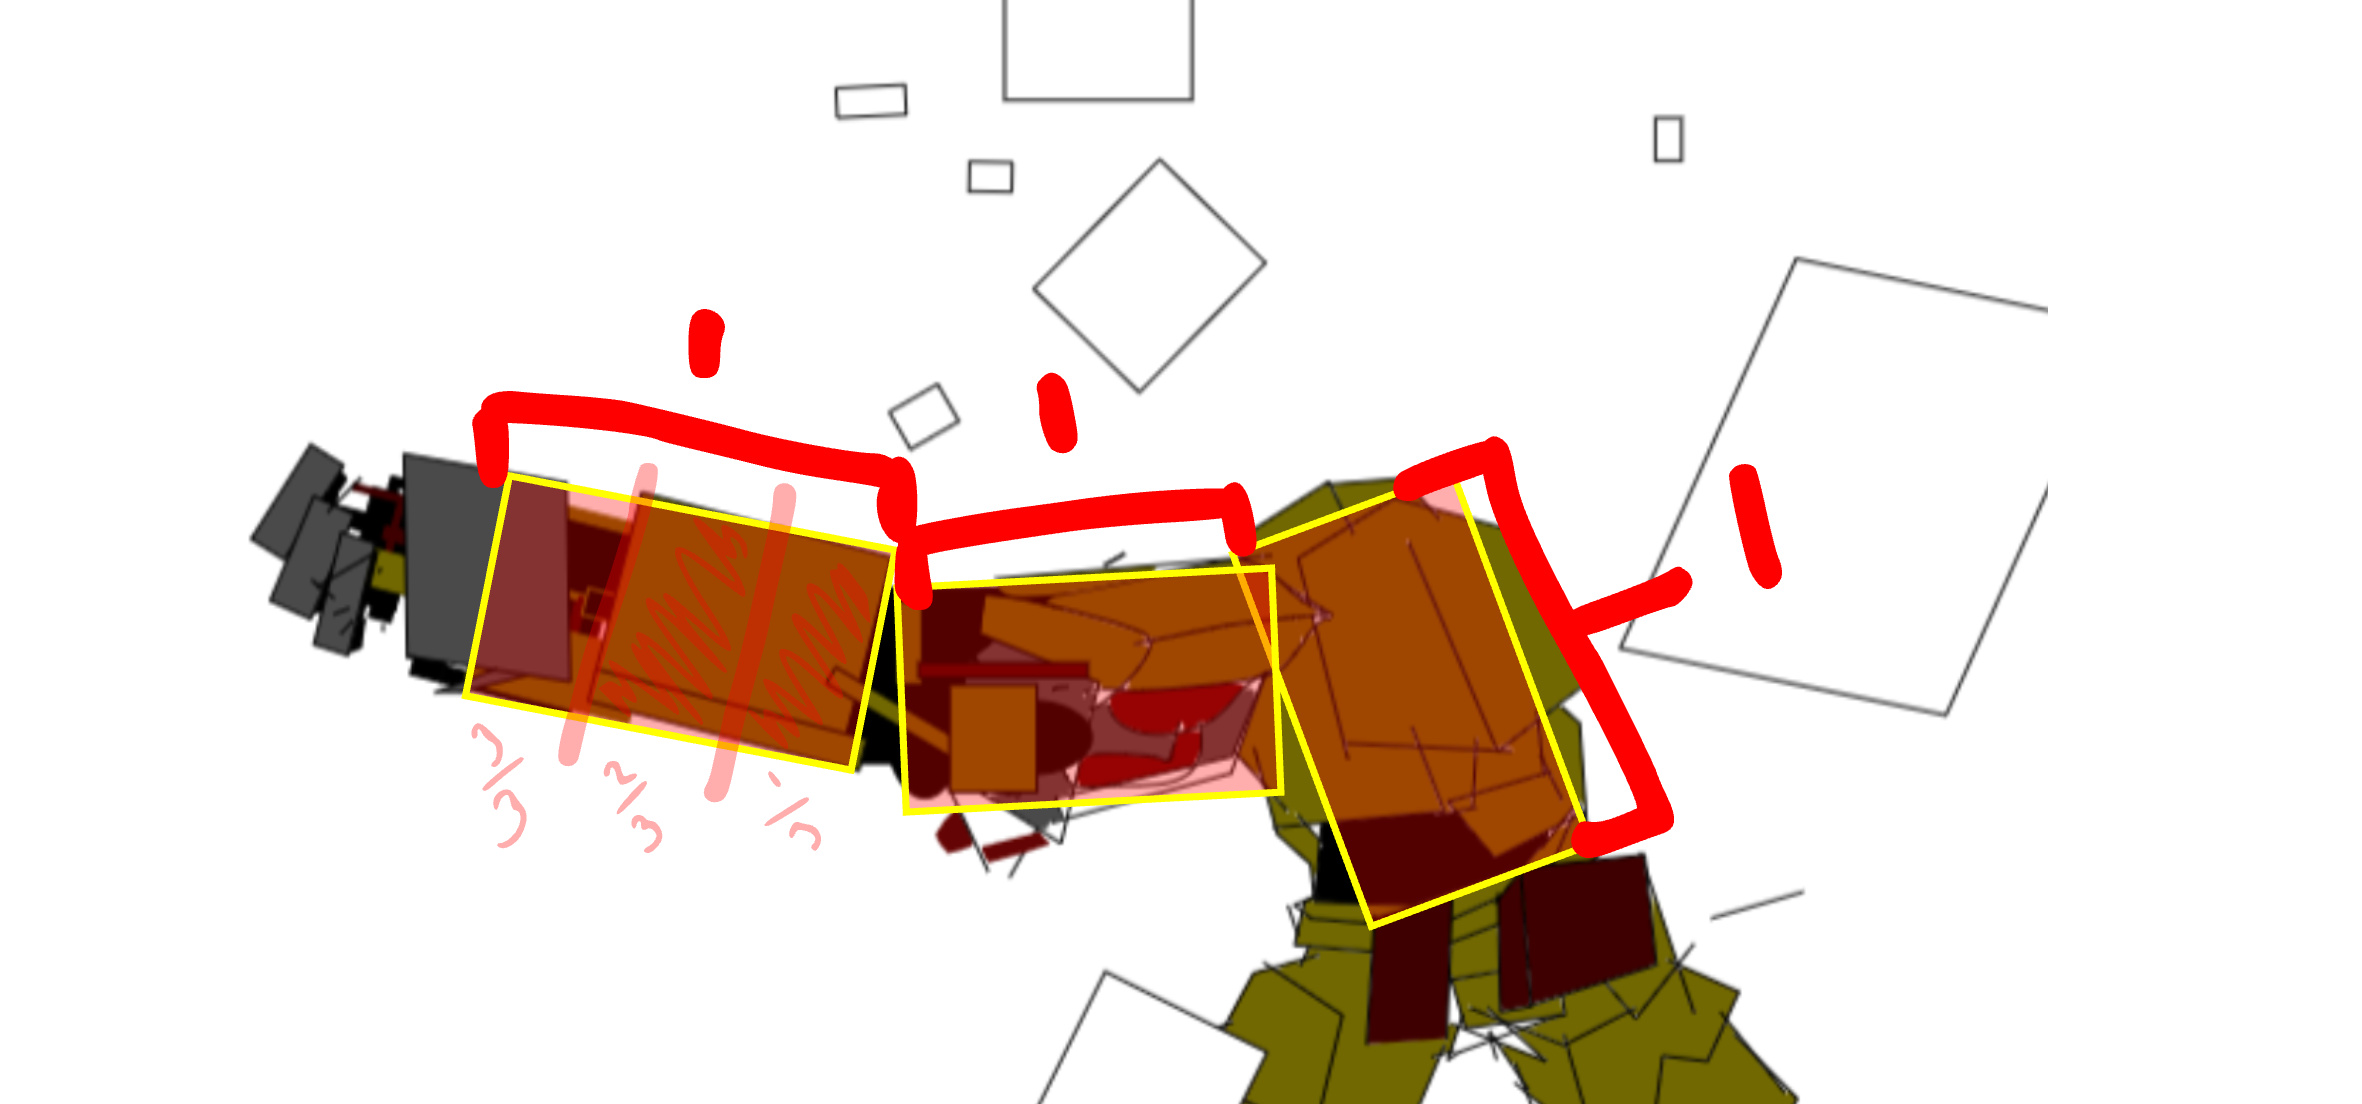
The “hand” part also starts after 2/3rds of the second part of the arm.
This will be important to remember when animating from a different angle, to keep the arm always twice as long as the height of the body, cut the second part into thirds and start the hand after the last part.
Notice how they also have a closely similar width as well?
Whenever you’re animating something you might need to reference different parts of the character itself to make sure you keep it at the right size.
You’ll notice that even in real life a lot of things align in crazy ways. I’ll give you an example of a random face I found online by googling “random person”
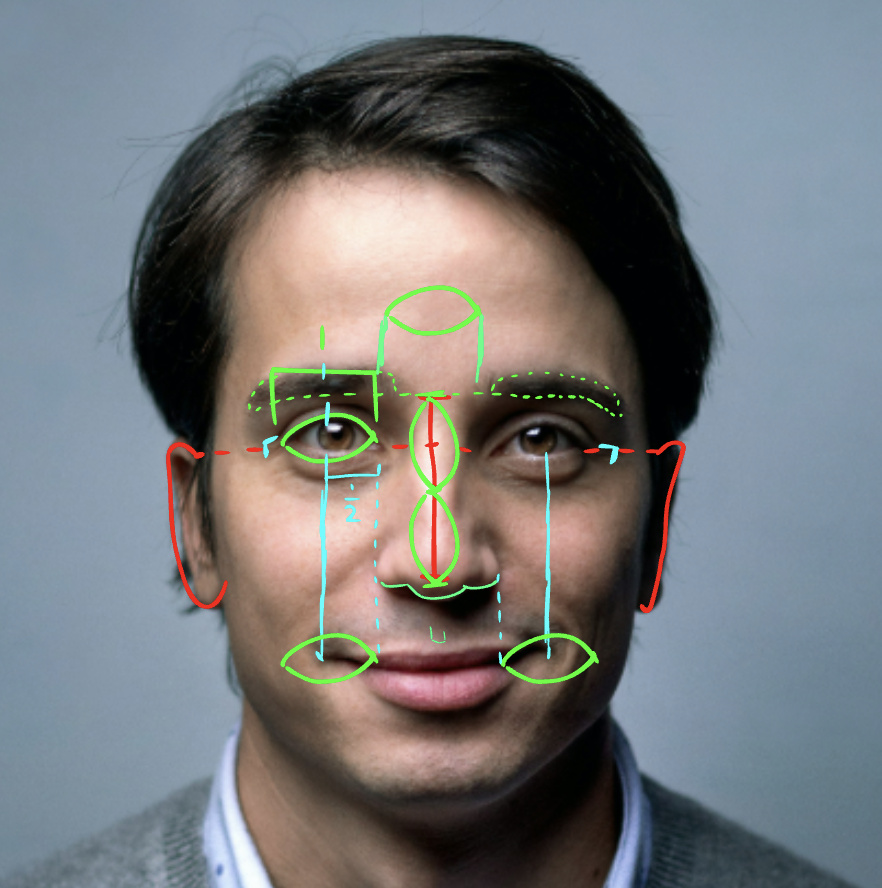
Top of the ears aligns with the eyes vertically, you can say the nose is double the width of the eyes, the mouth starts and ends at the center of each eye, with half the width of the eye between where it starts and ends is the nose’s width, and that is the width of the eye meaning you can fit one in there.
If you zoom in on the eyes as well you’ll notice that the pupil touches the bottom and top of the eye. Destroying this alignment by making the pupils smaller can be used to express fear or surprise.
Remember when I said
This is exactly what I mean.
Being able to find patterns in shapes like these is what will help you animate them over hundreds of frames with as little mistakes as possible.
Also where you find these patterns is important. In the case of your character, it’s made out of metal, so you can’t bend it very flexibly but based on the structure you can move it at these points.
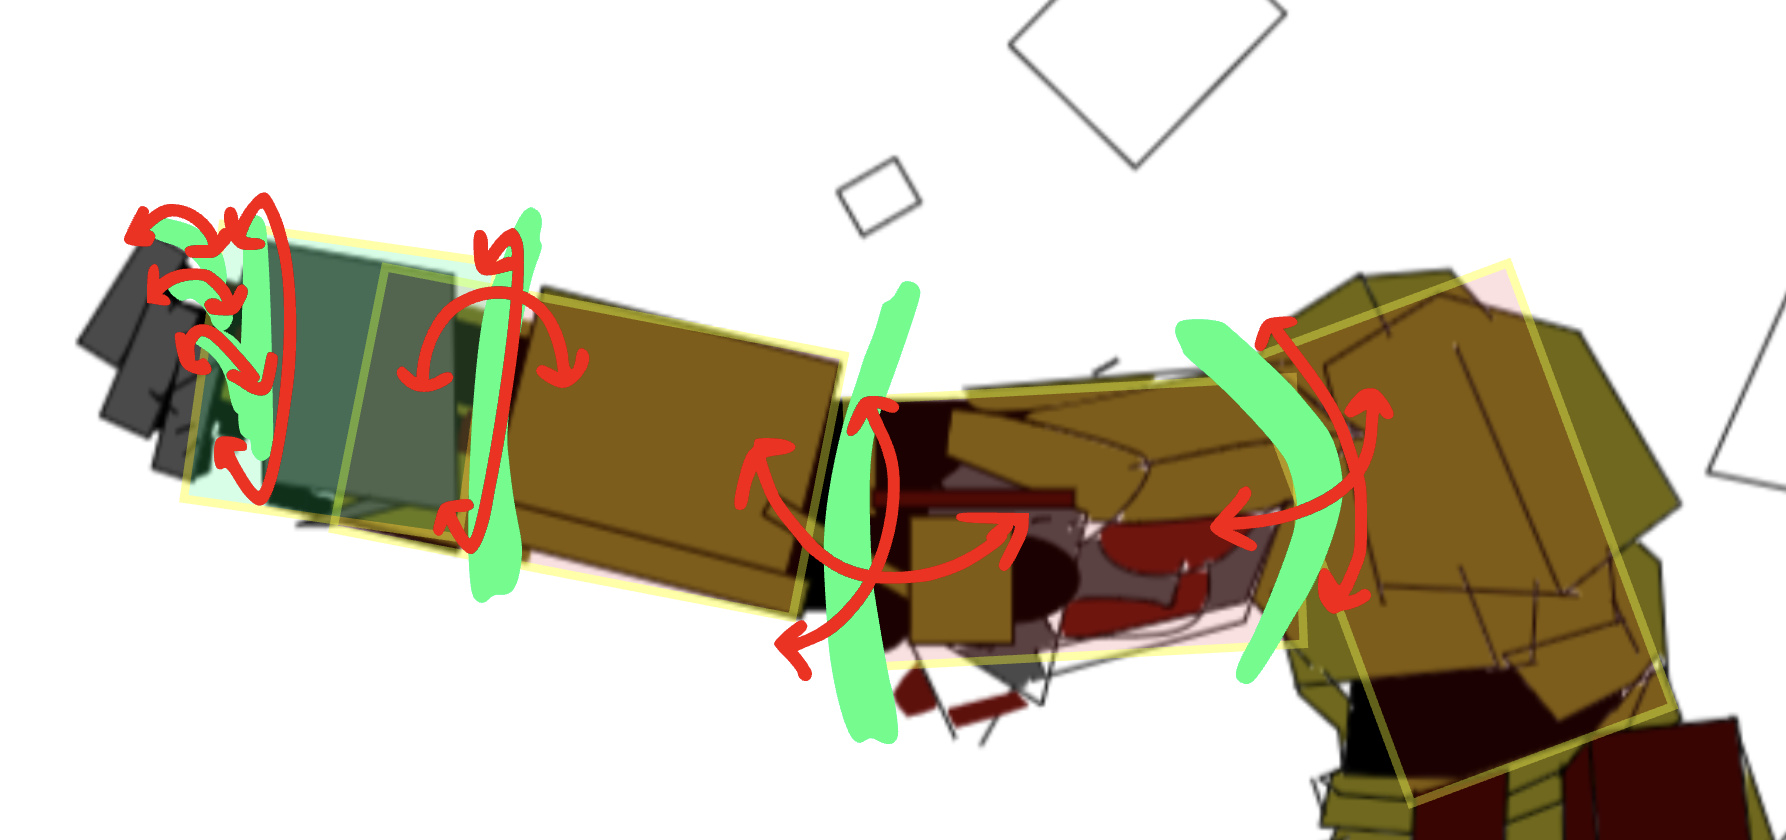
So cut the arm into these sections and make sure you keep the patterns between them going.
Also remember when things are farther away from the screen they look smaller, so only in such cases will these patterns be slightly effected but they’d still be useful with a good eye.
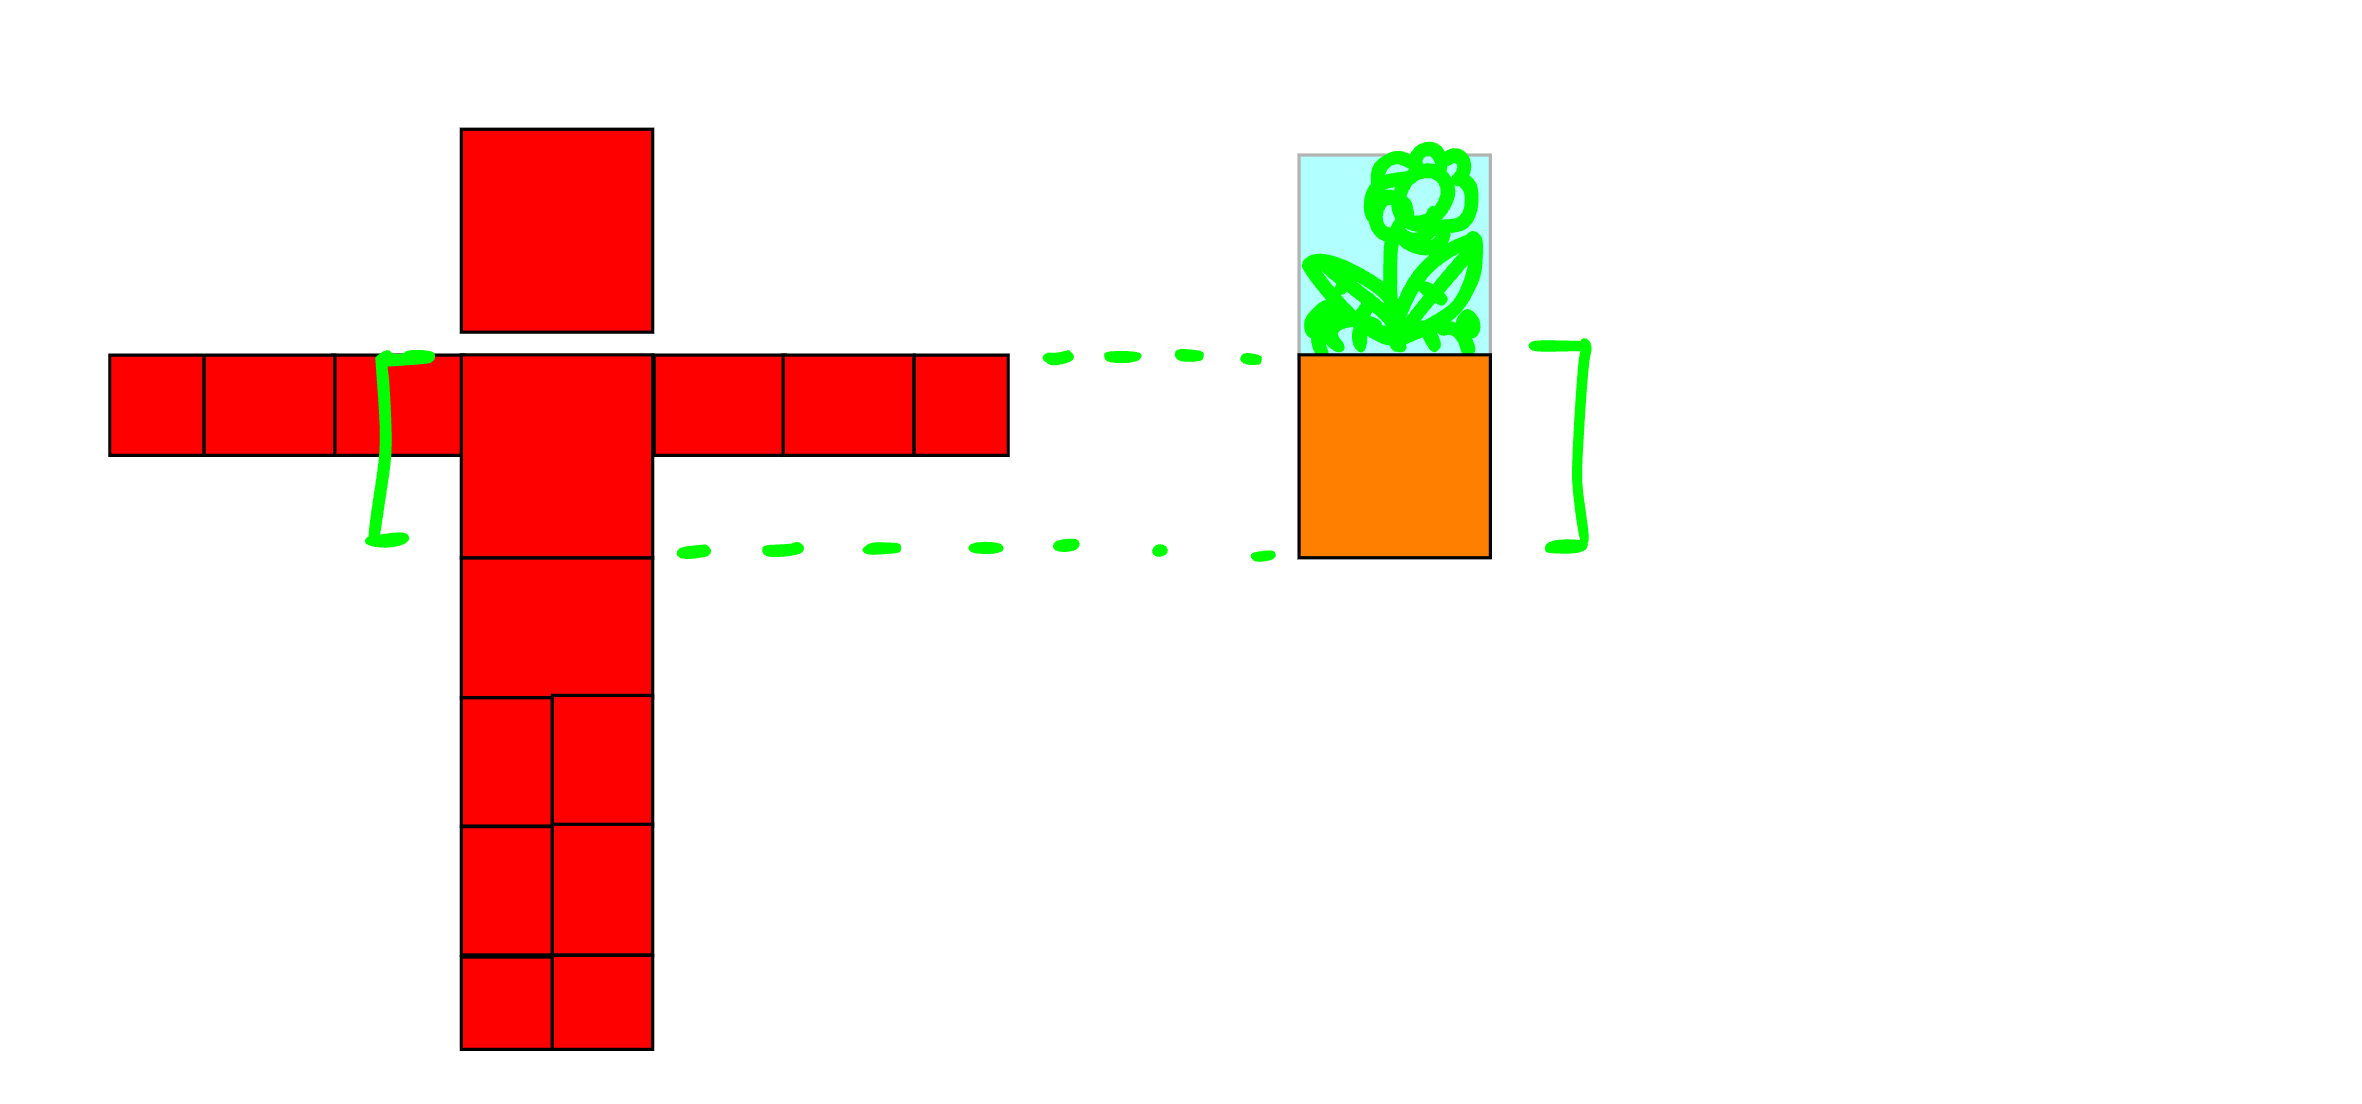
When working in an environment you’ll also want to compare your character’s size to other characters or objects.
For instance, say you have flower pot. Try to compare it with the height of the player. If the flower pot is as tall as the upper body of the player, always keep it that way in all different frames of your animation.
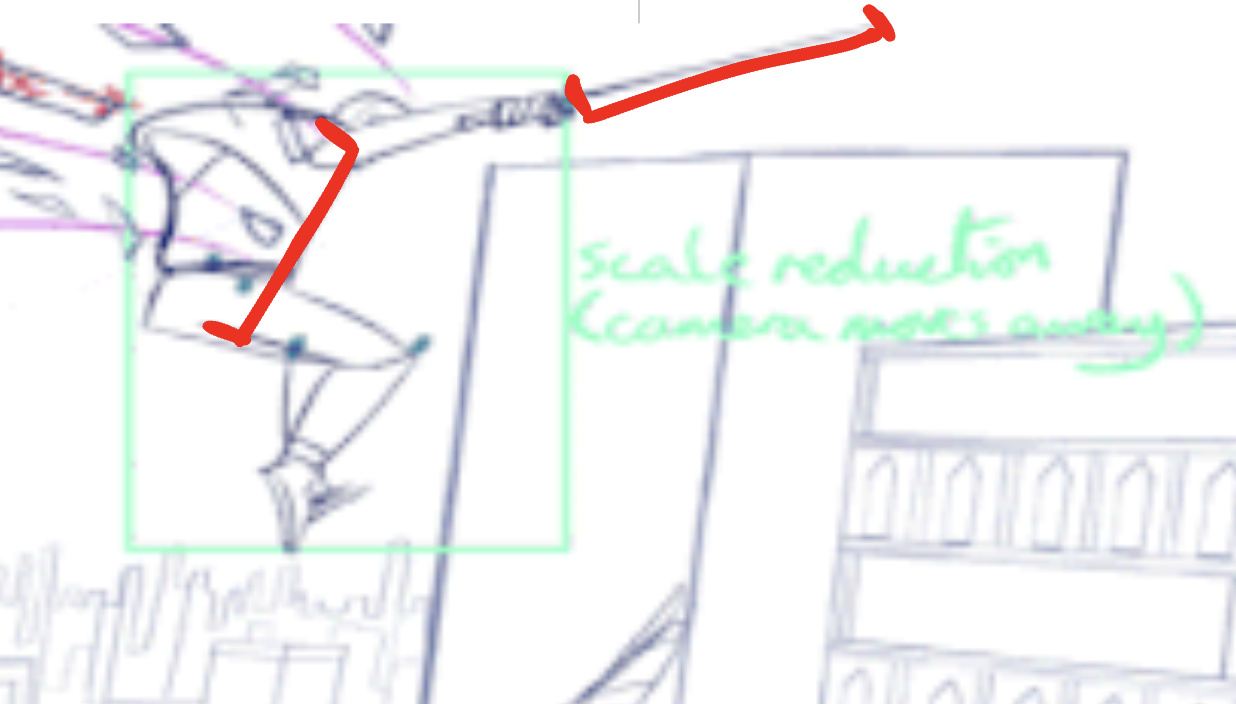
Back to the animation you send since it’s a great example—
the sword is a great way to show this.
You’ve probably noticed, when the character jumps out the window, the view zooms out so the character becomes smaller, but so does the sword. That’s bc it’s consistent with the character’s body.
I’m only speaking from my experience in perspective art.
I’m sure there’s more to it than I realize that you’ll probably learn as you go.
Bonus: look into the golden ratio & rule of thirds. Might not help you much but still good to know.
2 Likes
I’m thinking of making a fork of Wick for organized people. Anyone have ideas?
2 Likes
THIS POST IS DEAD LEAAVE!!! (wick forums sentencey nerdy stuff)
People can change topics, and replies are still running here. You can’t just command people on the Internet.
Thank you so much I appreciate the help I might remake the mech guy but I’ll try to make it more consistent proportionally. as well as how certain parts work as a mechanism.
1 Like
Definitely upgrade React. The version used by Wick requires such outdated versions of node and npm, and a serious development of Wick Editor should prioritize updating the framework.
1 Like
Yooo I forgot all about this :0