The PERFECT Vcam (Latest Version: 0.4.1)

I wasn’t intending on creating a new vcam to begin with, but one thing led to another, and I somehow created a new vcam starting from an empty project.

Note: The borders are coded to cover only the area that is visible and not inside of the vcam in version 0.1.


Wick File (version 0.1) (12.8 KB)
(Note: I shared version 0.2 below)


KEYS:
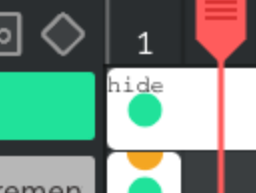
(Note: To remove these keys, go inside of the first frame in the layer titled “vcam,” and delete the code in the update script. These keys were only added for testing purposes.)

right = Pan right
left = Pan left
up = Pan up
down = Pan down

space + right = Increase vcam’s width
space + left = Decrease vcam’s width
space + up = Increase vcam’s height
space + down = Decrease vcam’s height

w = Increase vcam’s width and height
s = Decrease vcam’s width and height

d = Rotate right
a = Rotate left


Note: It’s recommended to keep the vcam below the borders clip only so that the borders move at the same speed. The file for version 0.2 is below in this post, if you use that version you won’t need to worry about this.


Here's the vcam code in text (for version 0.1)
  • Default Script (2 lines)
this.project.renderBlackBars=false;
this.gotoAndStop(2);
  • Update Script (10 lines)
var WHDW = window.innerHeight/window.innerWidth;
var PHDW = project.height/project.width;
gh = WHDW < PHDW?project.height:(project.width/window.innerWidth)*window.innerHeight;
gw = WHDW > PHDW?project.width:(project.height/window.innerHeight)*window.innerWidth;
var k = this.height/gh;
var k2 = this.width/gw;
this.project.zoom = k2>k?gw/this.width:gh/this.height;
this.project.pan.x = -(this.x - project.width/2);
this.project.pan.y = -(this.y - project.height/2);
this.project.rotation = -this.rotation;

Report any issues or recommendations here, and I’ll take a look at them later. Feedback is also appreciated.
Thanks for reading :)


EDIT:
For those who are used to using the built-in vcam and prefer to have the borders inside of the vcam’s timeline, I’ve decided to take the current vcam asset, and with some adjustments, implemented my vcam’s zoom code inside of it so it works the same way as my vcam.

Wick File (version 0.2) (12.1 KB)
(Scroll down for the latest version)

Note

I used the same panning and rotation code from the original vcam since those weren’t broken.
Feel free to use this in any of your projects, no need to ask.

If you want to know how this works, feel free to ask, I’d be glad to explain!
I’m planning on creating a website with wick for sharing wick tutorials & assets, so I’ll add an explanation to this there as well when time comes :)

5 Likes

Version 0.3, this version of the vcam includes a function that takes a screenshot of the screen and downloads it as an image. Pretty cool, right?

The code for this function is inside of the vcam itself.

To use it, just type this line anywhere:

screenShot("FILE NAME.png")

Inside the file, there’s a button you can click for testing to do that. Use the arrow keys to move anywhere, then click the camera icon!
The red borders aren’t necessary, but will help you see the measurements of the image (inside of the html version, not the editor).

Here’s the file: Hamzah’s Vcam (0.3).wick (13.5 KB)
If you want to use this, all you need is the clip named “vcam,” you can copy and paste it into your project.

You can also use the screenShot function without the vcam. The code is here:

window.screenShot = function(name){
    var dl = document.createElement('a');
    dl.download = name;
    try{
        try{
            dl.href = document.getElementById('view-3').toDataURL();
        }catch(err){
            dl.href = document.getElementById('view-2').toDataURL();
        }
        console.warn("Taking screenshot inside Editor");
    }catch(e){
        dl.href = document.getElementById('view-1').toDataURL();
        console.info("HTML version");
    }
    dl.click();
    return dl.href;
};

This is going to be quite helpful if you want the user to share an achievement or a score they got in your game! I tried to keep it simple and easy to use, if anyone has any issues with this, let me know!

2 Likes

This is amazing! Maybe someone could make something like Pokemon Snap with this…

1 Like

lets say I have a vcam capturing everything but I have something over the vcam how can I make it capture what’s under the vcam and not under the vcam

How the current screenshot function works is by taking the canvas element that the project is within and converting it into an image url, which is then used to download the image.

The easiest way to avoid having things inside of the image is by setting their opacity to 0 to hide them, or taking them to an empty frame, before capturing the image.

As a side note, after setting an object’s opacity to zero, you might want to wait a twelfths of a second or such for the image to update before capturing it, so something like

this.opacity=0;
screenShot();

Won’t give the editor enough time to display the opacity as 0 before capturing the screen.

Something like

// Default:
this.c=0;
this.opacity=1;
// Update
if(something){
this.opacity=0;
}
if(this.opacity===0) this.c++;
if(this.c>5){
screenShot();
this.runScript('default');
}

might work better.
(I might update the screenshot function later today to make it easier to hide clips for a screen capture)
Let me know if this isn’t what you meant.

I’m kinda confused on how to implement this can you please explain a little bit more on how to implement it or give a wick file

Looking back at your question, I just realized that I might’ve misunderstood it… if you meant that you want things over and under the vcam to be in the image, then no worries, the screenshot function should capture everything that is visible in the screen at the time that you use it.

If you don’t want things to be in the image, then set their opacity to zero or hide them some way before taking the screenshot. If you do hide them, you might want to set a quick timer before taking the screenshot, like wait a twelfth of a second (that’s technically what I meant in the last post summarized in 2 sentences).

I was planning to update this vcam to make it easier to hide multiple objects in a screenshot, but my editor is constantly crashing and it’s getting late for me so it might take me time.
If you still don’t get it, you can send me a basic file explaining what you want or don’t want to be shown in a screen capture, and I can send you back the same file with basic fixes and explanation.

I hope this helps, and sorry for any confusion

So you see how in windows 10 if you press Windows key + G it makes this

visible but if you take a screenshot it doesn’t show this over the screen it only screenshots what’s under it

1 Like

Thanks @Jordy, that image helped me understand what you meant!
I decided to update my vcam a bit to make it easier to hide frames while taking a screen capture.


I present to you version 0.4:

Hamzah’s Vcam (0.4).wick (19.2 KB)


To prevent a frame from being shown in an image in v0.4, you don’t even need to code anything, just name the frame that you don’t want to be shown in an image something with the word, “hide,” like this:
Screen Shot 2022-10-10 at 8.55.24 PM
“hide1,” “hideme,” “hidehide,” and any name that has the word “hide” in it should let my code know to hide that frame (this only implies to frames).

I hope this helps you

1 Like

Great! one more question though how could this be applied to clips, I saw that you said it only worked for frames.

With a bit of tweaking, I made it work with clips:
Hamzah’s Vcam (0.4.1).wick (19.3 KB)

In this version (0.4.1), as long as a clip’s name has the word, “hide,” in it, it should be hidden :)

This might be better than my last method with hiding entire frames since the clip can still be referred to elsewhere when it’s hidden this time.

1 Like