
Hi. I am a new user of the Wick Editor and I want to use it to teach others about animation, Tweaning and graphics. I love the Easy to use interface, but I have had to do a lot of work to figure out how things work that should have been in a simple manual. There are still UI controls that have no explanation anywhere I can find. The forum has been invaluable, and the examples, but it would be so much easier if there was a manual so I can see what is and is not included in the wonderful software.
Thank you again for your great work
Greg Palmer
2 Likes
So far the devs have made a bunch of great video tutorials. If you’re just doing animation then the only relevant videos are 1, 4, and 9 to 13.
If you want to learn more about the shortcuts or some cool applications of tweens and clips (to make a ball bounce), then I’ve written a tutorial here. I have several other written tutorials I’m slowly working on (lip syncing, color tweening, vcam, drawing trees, animating 3D rotations…
3 Likes
Thank you @HOTS for your reply. It would be nice to have a reference document somewhere instead of hunting down information, which takes a lot of time. Thank you for the links to your tutorials , they are very helpful. Your ball bouncing page is the nearest I have found to a manual. Great work!!
Do you know if there is a way to simulate the bone mechanism I have used elsewhere. So a leg can have a connected joint. I saw a useful note from someone about how to create a rotation point at the knee, but I cant join it to the other bones.
Also, what is Gap Fill Mode do? I cant see any difference when I click it.
Thanks again
Greg
2 Likes
Concerning documentation, the main Wick site has links to the videos. It’s a convenient location for people who are starting. The devs could also choose to link to any written tutorials when more of them exist.
Wick doesn’t have a dedicated bone tool, but you can use the same techniques as Flash to make a “rigged” (puppet) animation. Flash technically has a bone tool but it sucks so I don’t think I’ve seen anyone use it.
Similar to Flash, it’s a lot of effort to make puppet animation. There are 2 approaches:
-
You may choose to keep all your parts on the main timeline, manually placing them for each frame. Here’s a Flash tutorial which explains the basics. Not everything in it is relevant to Wick, but most carries over.
-
Or put clips inside each other. I usually prefer it (so parts can be joined together, like the knee you wanted), it’s faster and easier for repetitive movement and cleaning up your timeline, but gets confusing in big projects. Here’s a wick file showing how to make a knee kick: kneekick.wick (4.1 KB)
It’s a lot better to use the test branch of Wick because you can set the clips to Sync, which syncs them with the main timeline.
Gap fill mode means that when click an untouched frame, the gap between it and your frames is filled with blank frames.
4 Likes
Thank you @HOTS.
That is a very interesting animation. You appear to be tweening shapes made into clips. I thought Wick could not do that.
But I don’t understand how you got the rotation point at the top left of the leg. It seems to be the centre of the curve you created at that point top left, but there are lots of other bits with rotation points. So I understand how you joined all the bits into a two clips and then into a single clip, but how does that top left curve rotation point get to be the whole clip rotation point. I need to look again at your file and try to figure it out. When I break apart the lower leg, the rotation point reverts to the center, not the top of the object so I am missing an important step you did. Sorry.
Thank you very much. This is very helpful and has solved one of the Wick things I thought could not be done.
Cheers
Greg
1 Like
The rotation point for each part is at the center grey + shape inside each clip . So you create a leg part, make it into a clip, edit its timeline, and move it so the + is where it’ll rotate.
Here’s the upper thigh clip, with the + at the hip.

If you go inside the lower leg clip you can see the + is centered at the knee, so that’s where it rotates.
“break apart” turns a clip into basic shapes again, deletes its timeline, and breaks any tweens.
2 Likes
Just having a point to move, like in flash, would have been way more intuitive! 
@HOTS great work on those examples and especially on the bouncing ball. I know there are a bunch of tutorials on bouncing balls all over the web, but dedicated tutorials to WICK will make the app richer, easier, and more attractive to newcomers.
More tutorials like that would be much appreciated! 
THUMBS UP! 
2 Likes

Quick question @HOTS. How do you do the Sync you mention? I can’t see anything indicating a Sync action. Is it just part of the movie in test build? Thank you for your help
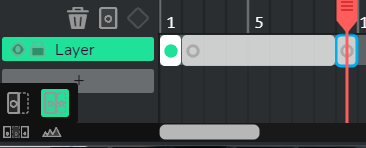
For Syncing, if you click on a clip when using the test build (at test.wickeditor.com), on the right-side there are options for Loop, Sync, Single Frame, and Play Once.
- Loop is the default. Clips play their own thing, regardless whether the main timeline has been paused or restarts. If you aren’t playing the anim, you can’t see what’s happening in the clip’s timeline from the main timeline.
- Sync means you can see what’s going on in the clip’s timeline from outside it, so it’s the most useful. The clip’s timeline is synced with the project timeline.
- Single Frame pauses on one frame of the clip. Very useful for puppet animation and lip syncing.
- Play Once is the same as Loop except it plays once.
The only way to really understand them is to test them out.
thank you @HOTS. I missed seeing that control, but I didnt understand what Sync meant in Wick. Ill give it a go.
