
Does anyone have a tutorial for making things drag and drop in the Wick Editor? I’m working on a dress-up game, my first one since highschool. But I can’t quite figure out the coding to make clothes and accessories drag and drop. The sample of the drag n drop code the Wick website provides doesn’t exactly help either.
You can copy and paste this code into the object’s update script:
if(this._mouseState==="down"){
     this.x=mouseX;
     this.y=mouseY;
     this.cursor = "grabbing";
} else {
     this.cursor = "grab";
}
Then when you play the project, you should be able to hold down on the object and drag it with your cursor.
To explain the code, the first line checks if the object’s mouse state is set to “down” (meaning the mouse is pressed down while over the object). If that’s true, then the x and y coordinates of the object are set to the x and y coordinates of the mouse (lines 2 & 3).
The cursor is also set to “grabbing” and “grab” so that when the cursor is over the object, the cursor changes into a hand, and a closed hand when it’s holding onto the object. You can delete these two lines that start with “this.cursor” if you’d rather not have that in your game, but they’re a nice addition.
2 Likes
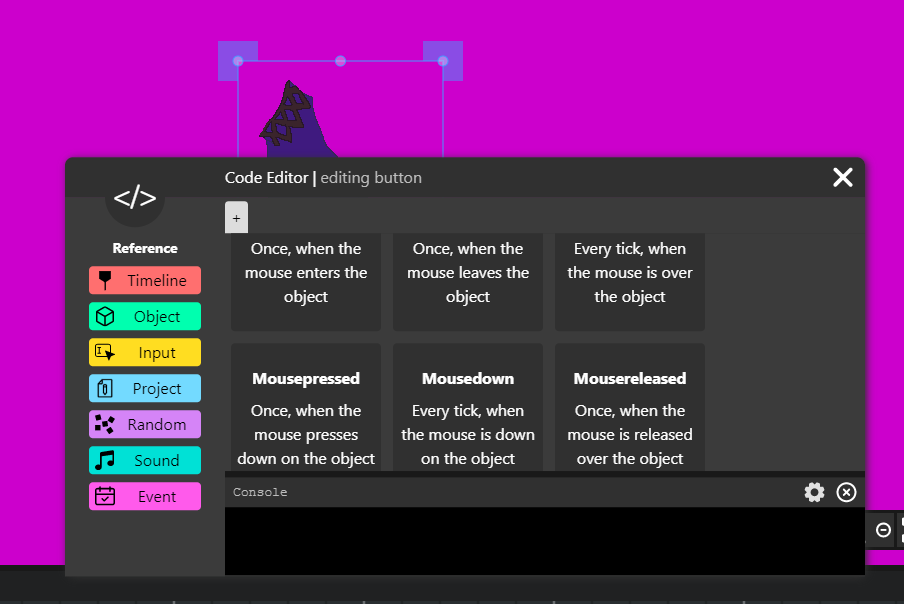
First thing, select timeline (this will help you access scripts connected to the timeline)
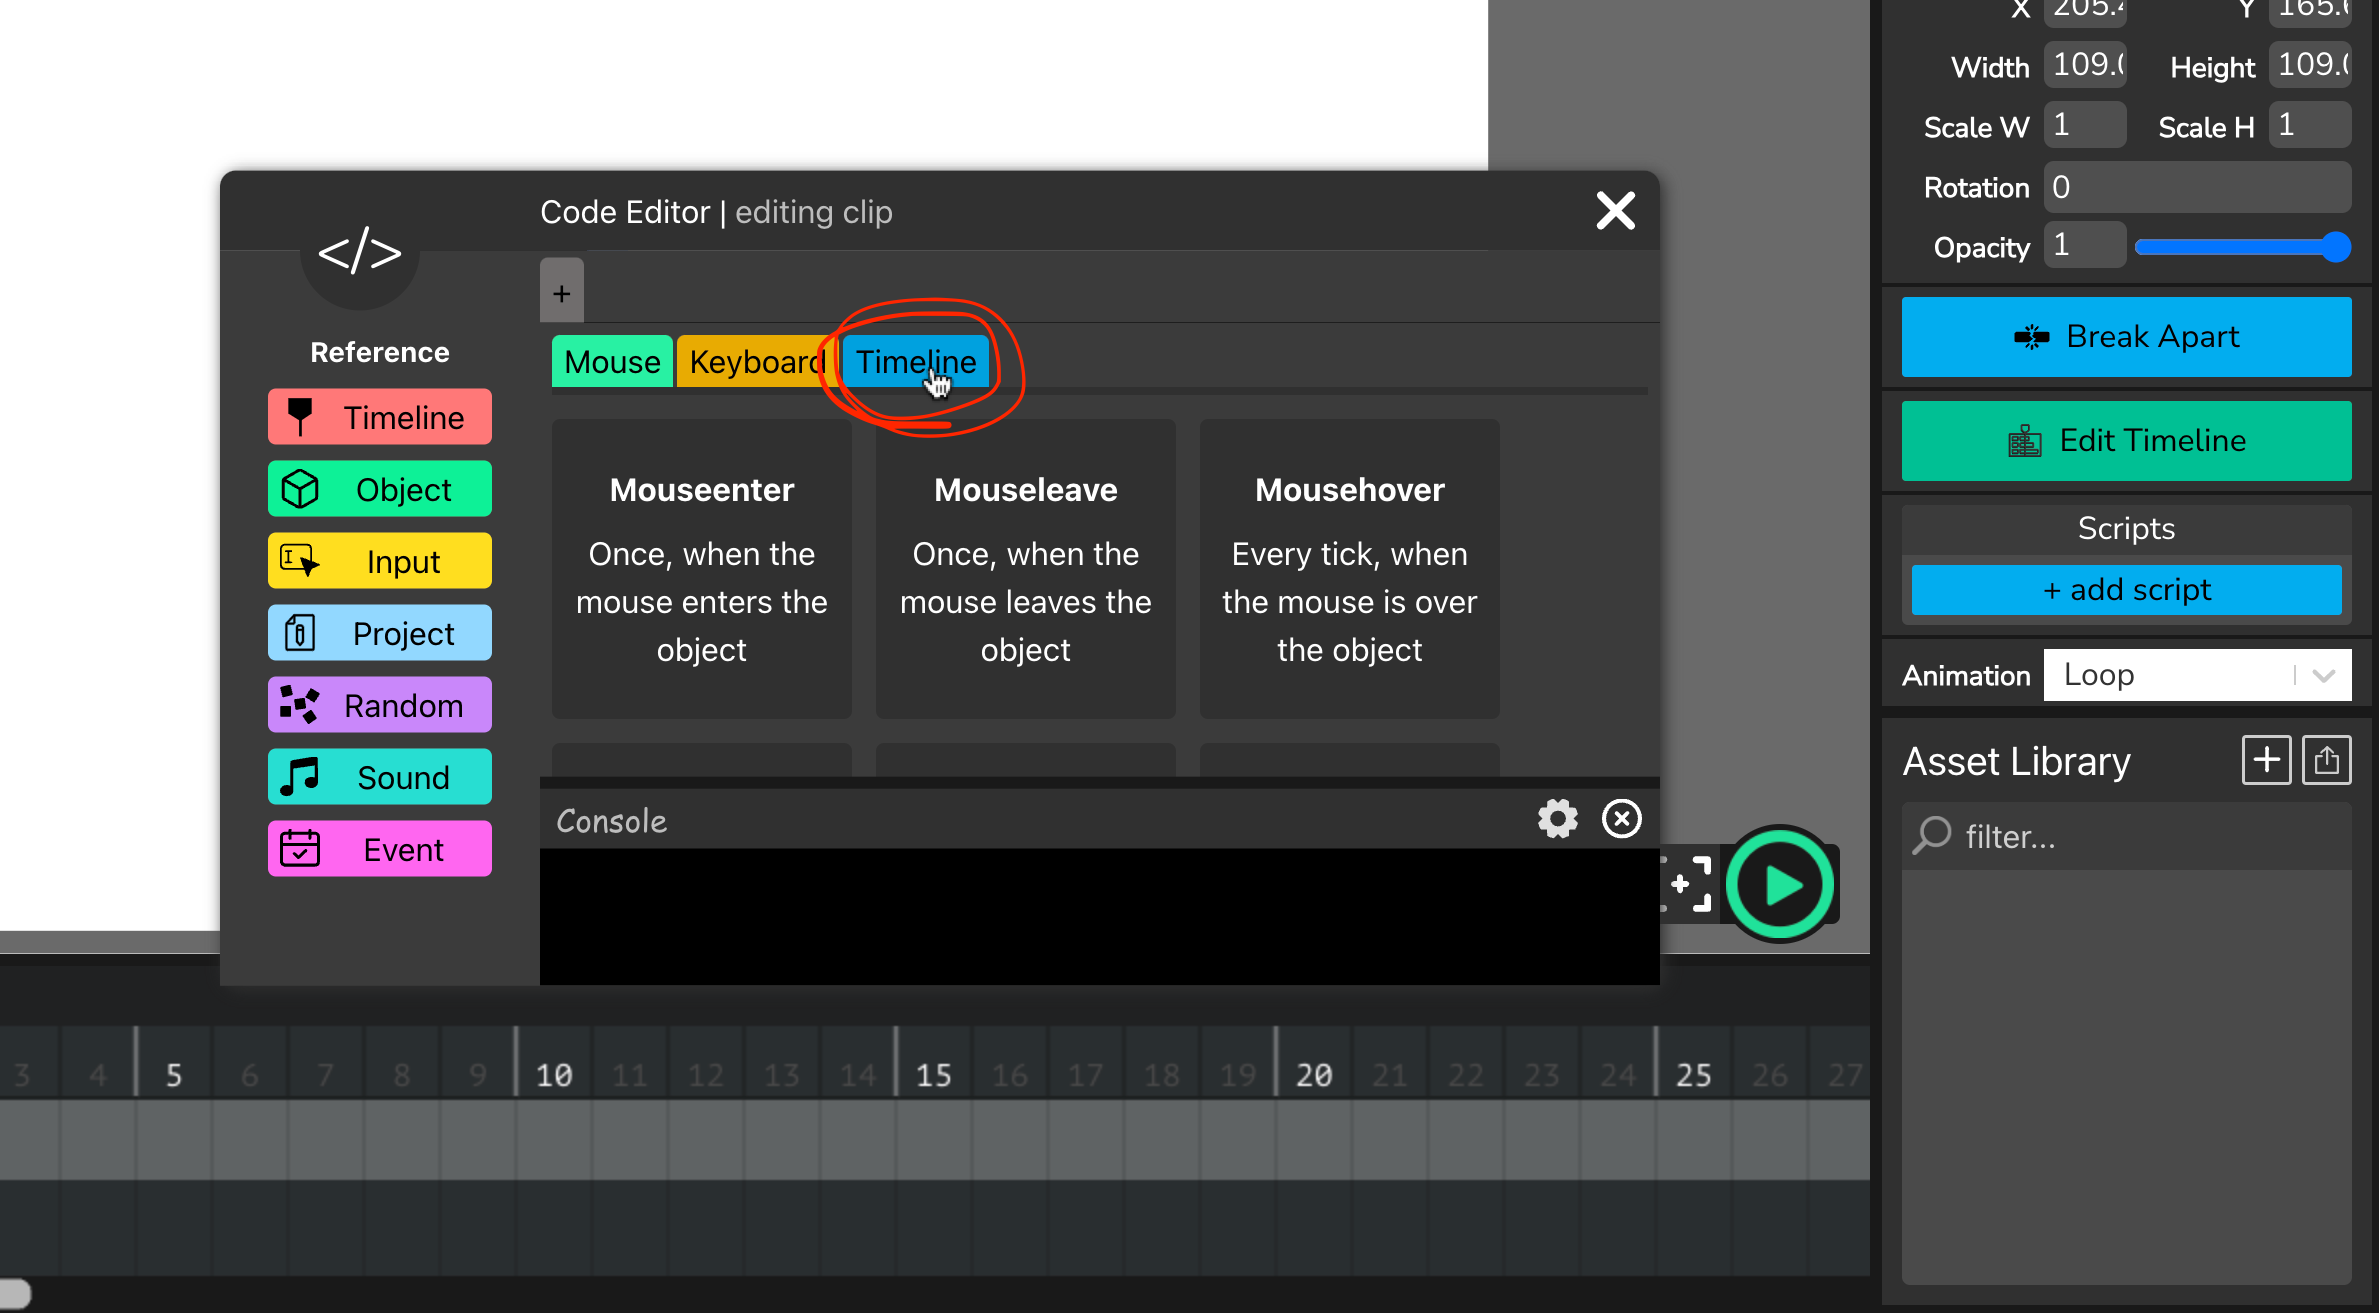
The click the update script (which is a script that will keep running with the project)
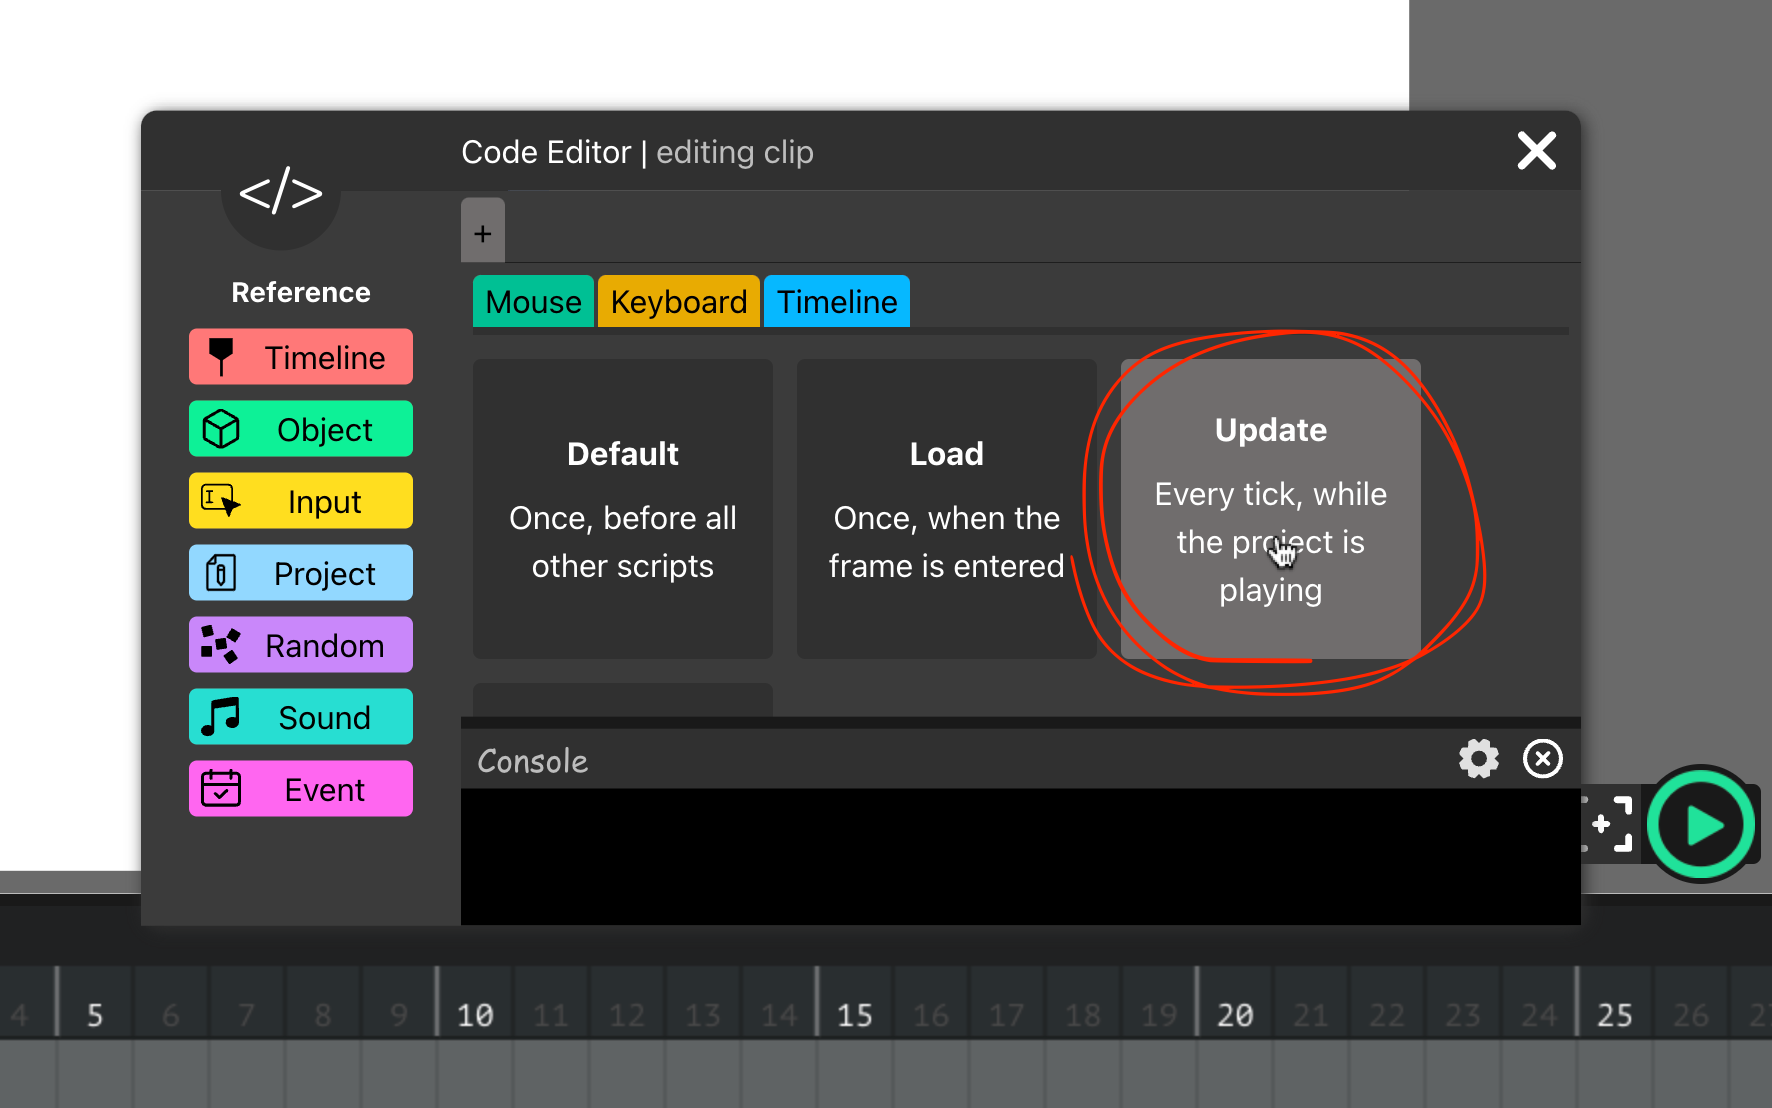
And you can paste the code there.
If you also want to do more coding in the future, I recommend reading through the code and making sure you understand it well.
2 Likes
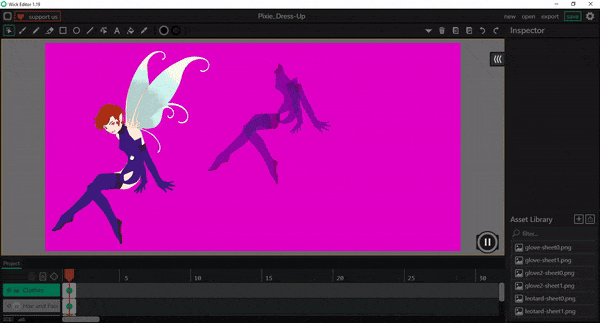
I think there’s something I’m not doing right. I’ve put in the code according to your instructions, But as you can see in the gif I just shared, the pixie’s leotard just jumps to the bottom of the screen when I click on it rather than move with my cursor. I remember this same thing happening when I copied the code from the sample wick demonstrating drag & drop mechanics… 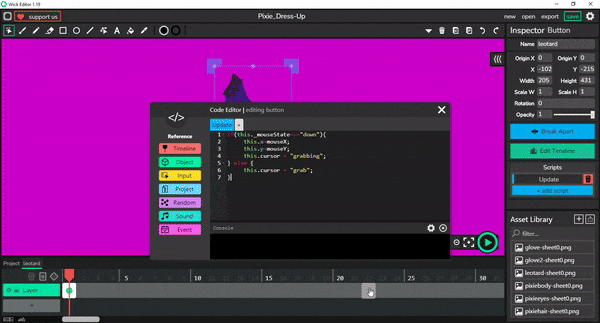
1 Like
Ah I see, that’s because you pasted the code inside of an object inside of the clip.
To explain— when you’re inside of the clip, the center of the clip is point (0,0), meaning that x and y are zero when you’re in the center of the object inside the clip’s timeline.
However, when you’re outside of the clip, the (0,0) point is in the top left corner of the project. The clip itself has some random coordinates— looking at the picture, I’ll assume your clip has an x and y coordinates of (200, 300). Then, when you click the clip with your mouse, the x and y coordinates of the mouse are also around (200, 300), however, the object inside of the clip has (0,0) coordinates, so when it tries to match the coordinates of the mouse, it goes 200 right and 300 down to also become (200,300).
It’s a bit confusing to explain in words, but it’s not hard to understand.
You have three options— the first is to move the same code inside of the clip to outside the clip, without entering the clip’s timeline.
If you want to stay inside of the clip, you can just replace the last code that I gave you with this one:
if(this._mouseState==="down"){
     this.x=mouseX-this.parentClip.x;
     this.y=mouseY-this.parentClip.y;
     this.cursor = "grabbing";
} else {
     this.cursor = "grab";
}
^ this code subtracts the x and y coordinates of the parent clip (the outside clip) from the mouse X and Y, so that when the mouse is over the object at around (200,300) (assuming the clip is at x and y 200,300) it subtracts it down to (0,0) to match the subclip’s coordinates.
The third option is to replace the last code that I gave you with this:
if(this._mouseState==="down"){
     this.x+=mouseMoveX;
     this.y+=mouseMoveY;
     this.cursor = "grabbing";
} else {
     this.cursor = "grab";
}
^ This code doesn’t rely on the mouse x and y coordinates, but rather on the mouse movement. Only downside is if your clip’s scale X and Y are not both 1, then it may be slightly off. Though I guess if that’s a problem, you could multiply the mouseMoveX and mouseMoveY by this.parentClip.scaleX and this.parentClip.scaleY.
I’m not sure if I explained myself well… so here’s a project with all three options that I listed above:
My Project6-13-2024_19-46-18.wick (4.5 KB)
I hope this helps.
3 Likes
Oh wow, that actually worked! Yeah, my knowledge with making interactive widgets (namely dressups) is based mostly on when I dabbled in flash animation back in highschool. And one would need to convert a button into a “symbol” in order to make it draggable without dragging everything else on the screen! Anyway, you were a big help in me getting this project going, thank-you!
… You wouldn’t happen to know anything about making draggable objects snap to a specific spot if dropped near, would you?
1 Like
Alright, now I’ve run into another problem, as demonstrated in this gif.
I’m holding down the mouse as my cursor just inexplicably lets go of any articles of clothing I try to take. I’ve noticed the same thing happen when playing around with that demo you sent me, Hamzah. Do you think it just has something to do with testing out the wick within the editor?
1 Like
That’s because the code only runs when the mouse is pressed down over the object, and so if the mouse moves too fast and leaves the object then the code doesn’t run. There is a way around it, though it’d require an extra step— and that would be to define the selected object inside of a variable.
The first step is to create a window variable for selected object, paste this code inside of any default script:
window.selected = false;
Then, inside of the last code that I gave you, and depending on what option you picked, make it so that when the object is pressed down, the selected variable is set to it, and add an additional condition so that even when the mouse isn’t down on the object, if the selected variable is set to the object and the mouse is still down, then keep running the code.
if((this._mouseState==="down"&&!selected)||(isMouseDown()&&selected===this)){
    selected=this;
    this.x=mouseX;
    this.y=mouseY;
    this.cursor = "grabbing";
} else {
    this.cursor = "grab";
}
^ replace the 3rd and 4th line based on what option you chose to go with from the ones I gave you.
Now, the last step is to add these two lines of code to any update script. What this does is it resets the selected object to false when no object is selected (when the mouse is not pressed down).
if(!isMouseDown())
selected = false;
And with this, you get a more perfect drag and drop system.
Example file: My Project6-13-2024_23-27-08.wick (4.2 KB)
Of course I do 
Now, in order to know when to snap an object to a place, you’ll need to know the x and y coordinates of where you want the object to snap. You can move the clip into that position, and look at it’s origin x and origin y values, then write that down somewhere so you know. For an example, I’ll use the x and y coordinates of 200 and 350.
Inside of each of the draggable objects, in their default script, let’s define a variable that tells us where we want this clip to snap to. Here’s the code, replace the 200 and 350 with your numbers for each clip.
this.snapeTo = {
    x: 200,
    y: 350
}
^ over here, I created an object. Learn more about objects here
Next, we know that we need to calculate the distance from the object to where we want it to snap to, and if that distance is less than a specific number, then we know to “snap” it there.
To calculate the distance between two points, the best method would be to use the pythagorean theorem.
But to keep things simpler, I’ll just use the difference in x and y position, which can be calculated by subtracting the x and y position of the object and the snapTo x and y. Subtract their x and y values and take the absolute value of that using the Math.abs method, and you’ll have a good idea of the distance between them in the x and y directions.
Math.abs(this.x-this.snapeTo.x) + Math.abs(this.y-this.snapeTo.y)
Now that we have an idea of the difference, all you’ll need to do is check if this is less than a specific number… let’s say less than 50. If the object is close enough for that to be true, then we can “snap” it by setting it’s x and y to where we want to snap it to.
if(Math.abs(this.x-this.snapeTo.x) + Math.abs(this.y-this.snapeTo.y)<50){
    this.x = this.snapeTo.x;
    this.y = this.snapeTo.y;
}
Now, be careful where you place this code! You want to only snap the piece when the mouse lets go. Back to the update code you already have, you want to add this code snippet just after the “else” statement. It should look something like this:
if((this._mouseState==="down"&&!selected)||(isMouseDown()&&selected===this)){
    selected=this;
    this.x=mouseX;
    this.y=mouseY;
    this.cursor = "grabbing";
} else {
    if(Math.abs(this.x-this.snapeTo.x) + Math.abs(this.y-this.snapeTo.y)<50){
        this.x = this.snapeTo.x;
        this.y = this.snapeTo.y;
    }
    this.cursor = "grab";
}
An example once again: My Project6-13-2024_23-52-27.wick (6.2 KB)
You are free to use my code in your game. All you’ll need to do is change the x and y values of the pieces from inside of their default scripts to the x and y values that you want them to snap to.
A tip that you may not know yet, when inside of Wick Editor, you can use the shortcut alt+k or option + k to play the project inside of a new window, and it’ll be similar to having the project play inside of an html file. So if you ever need to test your project outside of the editor, this is a good shortcut to use.
Also, you didn’t ask for this now, but you may need it later— if you want to bring pieces to front or back when you select them, then you may find this thread helpful:
Sorry for the… rather long reply this time… I tried to explain everything and ended up writing a huge reply again 
Either ways, I hope you found this helpful. I’ll hop off to dreamland soon. If you still need help with this project I’ll be glad to help out, just send a message and I’ll look at it tomorrow.
Best of luck with your coding!
3 Likes
Oh wow, this moves so much better now, Thank-you!
This part, I’m still struggling with, you wouldn’t happen to have some screen-capture software with which to record your coding process, would you? I tend to learn better with visuals.
Thank-you again for all your help in any case!
1 Like
I’m glad the code works better!
Oh yes of course! Here’s a recording:

Sorry I can’t have my voice in there so there’s no sound
I hope it helps you though, I tried to keep it slow and show how the project runs after I add in each line. If it’s a bit too slow, feel free to change the video speed.
(also i wonder how the video has 3 views if I just posted it and it’s unlisted… yt view counter really is broken  )
)
2 Likes
I might have to watch this a few times, especially while I try and do it myself. But I think I can follow it! Thank-you again for all your help!
1 Like
Thanks for this fantastic tutorial! I’ve been looking for something like this for a long time 
1 Like