
I have been working on a custom clone system that takes advantage of paper.js, wick’s renderer. Included in this version are many functions to add objects via code into your project. This is also a more optimized clone that wick’s clone function since there is no use of clips which can cause more lag than images or paths. If you have any questions or suggestions about this I try to answer them here.
Some code for moving objects in front and behind of each other from this post by pumpkinhead
How to use
When adding objects with this it takes them from a library of objects contained within the customClone clip. DO NOT MESS WITH THE FIRST FRAME of it because it has a image that is used for the pixel art and rasterization. To add a object that you can use just put it into a frame other than the first one. I suggest using paths and images (cause it meant to only use them).
Adding an object
let NAME = new project.obj(INDEX);
Replace INDEX with the frame that you want to get the object(s) from
Replace NAME with the reference name of your object
For all the other functions you can refer to the NAME of your object.
Example:
let myObj = new project.obj(2);
Changing position
NAME.pos(TYPE,X,Y);
Replace NAME with what you called your object
Replace TYPE with “set”, “add”, or “get”. “set” will set the position, “add” will add to the position, and “get” will return an array like this [X_position, Y_position]
Replace X and Y with the amount to add or set for that axis (if your type is “get” then just remove these)
Example:
myObj.pos("set",360,240);
Rotating an object
NAME.rotation(TYPE,AMOUNT);
Replace NAME with the reference name
Replace TYPE with “set”, “add”, or “get” just like the position function except that get just returns a number
Replace AMOUNT with how much you want it to rotate (not necessary if type is “get”)
Example:
myObj.rotation("add",40);
Scaling an object
NAME.scale(TYPE,X,Y);
Replace NAME with reference name
Replace TYPE the same way as the position function
Replace X and Y with how much you want it to be scaled (unless type is “get”)
Example:
myObj.rotate("set",2,2);
Moving objects in front and behind of each other
NAME.send(TYPE,AMOUNT);
NOTE: this only works if the object is by itself AKA the frame that you selected only had a single object.
Replace TYPE with “toFront”, “toBack” or “forward” will either send the object to the front, back, or forward back an amount
Replace AMOUNT with how much you want it to move if TYPE is “forward”
Example:
myObj.send("forward",-1)
Removing objects
NAME.remove();
Replace NAME with the reference name
Example:
myObj.remove();
Turning a object of a path into a image
NAME = NAME.toImg(PIXEL_ART);
NOTE: this only works if the object is by itself AKA the frame that you selected only had a single object.
Replace NAME with the reference name
Replace PIXEL_ART with either true or false for whether or not you want it to be pixel art
Example:
myObj = myObj.toImg(true);
Turn an image into pixel art
NAME.toPixelArt();
NOTE: this only works if the object is by itself AKA the frame that you selected only had a single object.
Replace NAME with reference name
Example:
myObj.toPixelArt();
Changing the fill color of the object (gradient included)
myObj.fillColor(TYPE,VALUES,SELECTOR);
This is very confusing so just ask if you need help cause it is hard to explain in words.
Replace TYPE with either “rgb”, “hsb”, “gray” for something that’s not a gradient, this will choose what the color type is
OR replace TYPE with {radial:BOOLEAN,colorType:TYPE} with BOOLEAN being true or false for whether or not it is a radial gradient and TYPE being one of the previously stated types from above
Replace VALUES with an array like this if its not a gradient [RED_OR_HUE_OR_GRAY, GREEN_OR_SATURATION_OR_ALPHA, BLUE_BRIGHTNESS, ALPHA] the values with be with whatever type you choose so if you chose “rgb” as the type then you would use [RED, GREEN, BLUE, ALPHA] format with each being a number between 0 and 1
OR if you want gradient you instead format VALUES like this [ [ COLORS ] [ BEGIN_POS ] [ END_POS ] ] with COLORS being formatted like [RED_OR_HUE_OR_GRAY, GREEN_OR_SATURATION_OR_STOP, BLUE_BRIGHTNESS_OR_ALPHA, STOP, ALPHA] again formatted depending on the color type then BEGIN_POS and END_POS are formatted like [ X, Y ] .
Replace SELECTOR only if you object has multiple paths/images in it with “all” or a number being the index of the path you want to change color (the lower on the outliner the closer to 0 the high on the outliner the closer it is to the max number of objects in the frame)
Example (for a gradient on a single object):
myObj.fillColor( {radial:false, colorType:"rgb"}, [ [ [0, 1, 0, 0.4, 1], [1, 0, 0, 0.5, 1], [0, 0, 1, 0.6, 1] ], [-50, -10], [50, 10] ]);1] ] [-50, -10] [50, 10] ])
Stroke Color
This is the same as the fill color function it just changes the stroke color
Project: CustomObjCloneV1.012-12-2021_14-36-19.wick (4.8 KB)
Pixel art + gradient
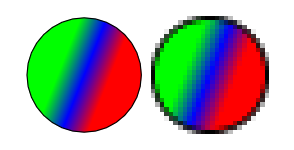
More pixel art

